
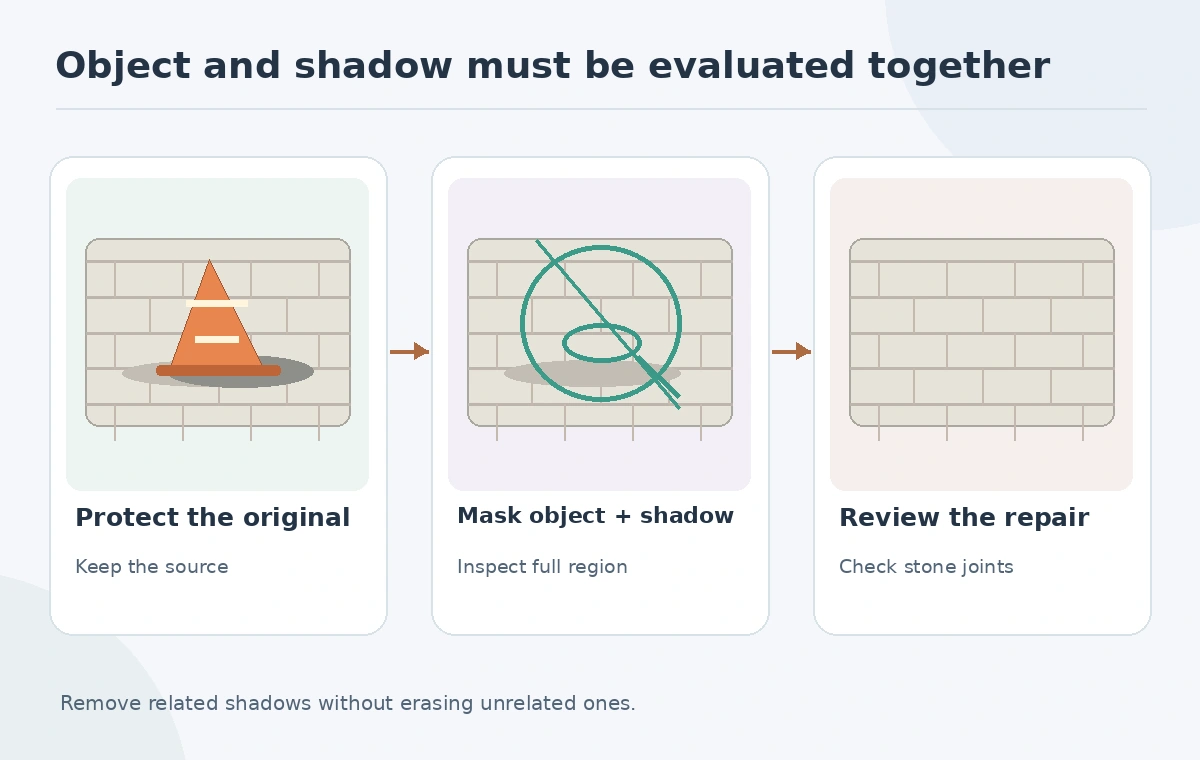
A small distraction can dominate an otherwise useful photograph: a bright traffic cone beside a park bench, a stray trash can or a cable near a product. An AI remove object from photo workflow can reconstruct missing background, but the object may cast a shadow or appear in a reflection. This guide uses a fictional cone on patterned pavement to show how to remove the entire visual footprint rather than merely erasing its brightest pixels.
Decide if removal is appropriate for the image
First separate cosmetic work from changes that distort a factual record. Removing a temporary cone from a staged promotional photograph can be reasonable with permission. Removing safety equipment from a workplace inspection, changing the content of news imagery or hiding a product flaw can deceive a viewer. Protect an untouched original and document the reason for the edit.
The task is also distinct from removing text, which requires checking lettering and typography. Here the difficult work is reconstructing surfaces hidden by a physical object, its contact shadow and potentially its reflection. For our park example, the acceptance test is whether paving joints and light direction remain plausible while the location of the original cone is traceable in the edit history.
Select the object plus dependent visual evidence
Zoom in before editing and inspect how the object interacts with the scene. Outline the traffic cone itself, then decide whether the dark triangle beside it is the cone’s cast shadow. If removing the cone, retaining its shadow creates an impossible scene. Add the shadow region to the mask only where it belongs to that object; do not erase shadows from the nearby bench.
Adobe’s current Photoshop Remove tool guidance describes looping around an object and adding to or subtracting from the selected area. The editable selection is often more important than a clever prompt. Check boundaries at full resolution before applying any generated pixels.
Compare removal methods rather than assuming one is best
Photoshop’s Remove tool has Auto, Generative AI on and Generative AI off processing modes according to Adobe’s help. Content-Aware Fill uses surrounding pixels and a controllable sampling region. Generative methods may be useful over irregular backgrounds, while controlled cloning or sampling may be preferable on repetitive geometry.
Make two separate edit versions instead of overwriting the first. Name them by method in the file metadata, not as technical codes printed on the picture. On the cone scene, compare how each method continues the pavement seams and handles grain. There is no need to make unsupported claims that one algorithm always performs best; inspect the actual output in the intended crop.
Check geometry, texture, and hidden reflections
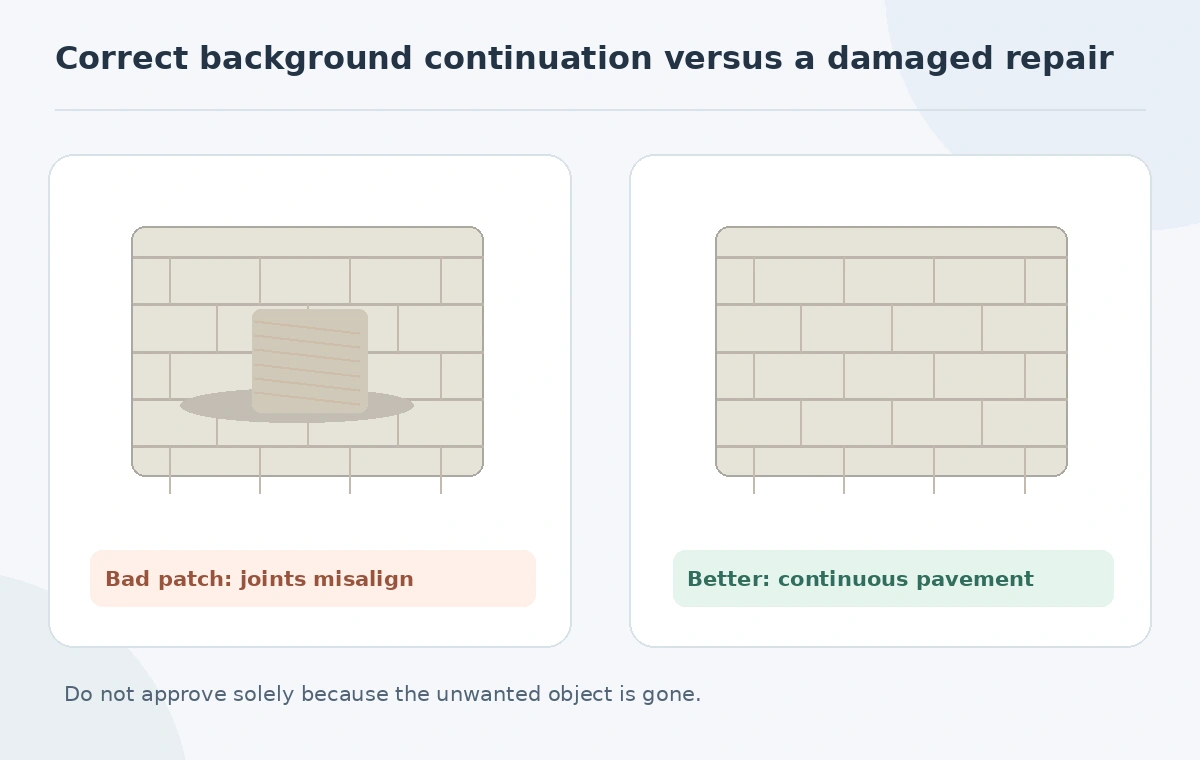
Inspect at 100% scale. The repaired paver joints should have consistent widths, believable perspective and no obvious repeated tiles. Look for a blurry oval, duplicated leaves, abrupt grain changes or a halo where the selection ended. If the cone was near wet pavement, verify its reflection is also removed or appropriately altered. The object’s occlusion can conceal detail that no tool truly knows.
Adobe’s Content-Aware Fill documentation explains that the sampling area determines which parts of the image provide replacement pixels. Constrain sampling when nearby objects have colors or shapes that would contaminate the reconstruction. The final patch should match lighting as well as texture.
Use a more honest option when the background is unknowable
Sometimes the original background cannot be recovered reliably. A large parked car may hide most of a brick wall; a group of people may overlap each other; a vehicle license plate may be essential evidence. If the reconstructed region looks invented, choose a different crop, acquire a clean take or leave the object visible. Generative plausibility is not proof of the prior scene.
For an e-commerce or corporate image, obtain approval for material edits before distribution. Preserve the photographic negative or source file with its capture context. The reviewer should distinguish aesthetic cleanup from alterations affecting the product, people or safety notices. Escalation is not failure; it protects the credibility of the published image.
Inspect mobile crop and full-resolution detail separately
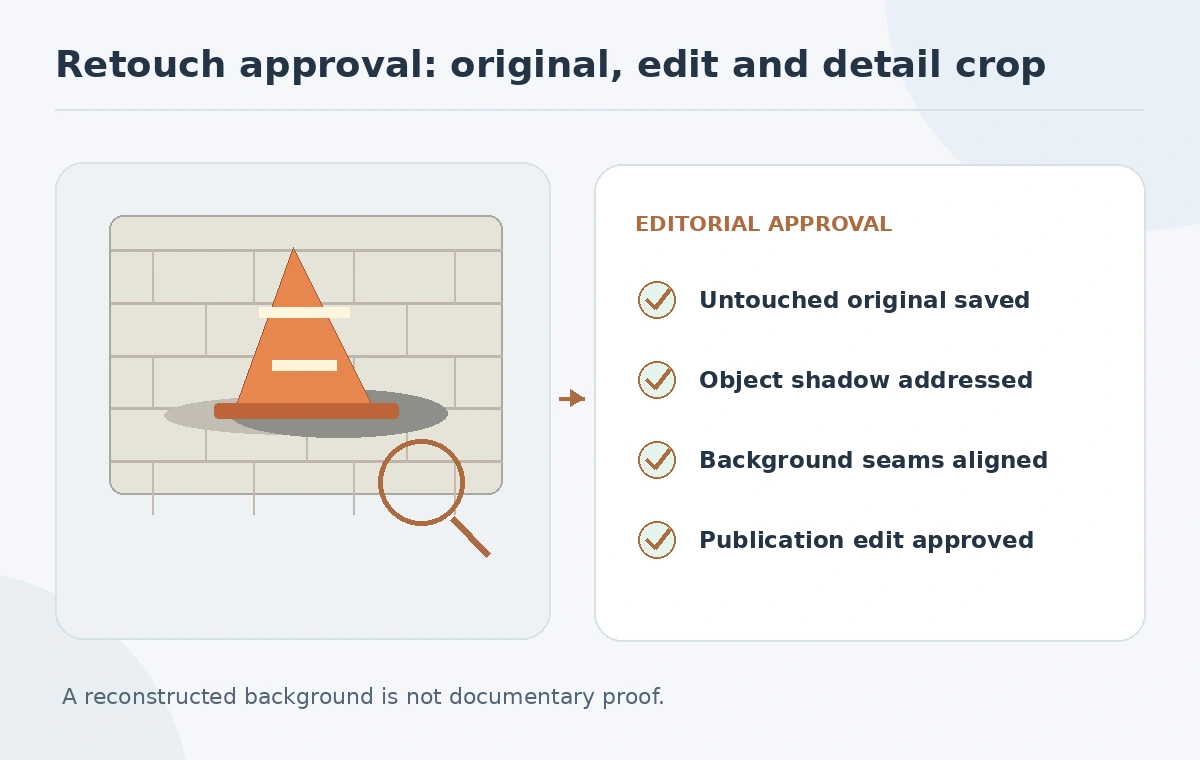
A retouch often looks acceptable at thumbnail size but reveals a repeated stone pattern when enlarged. Check both the intended publication view and a tight crop covering the removed region. Also view the image in grayscale to catch inconsistent shadows or hard transitions. If the source is a high-resolution photograph, preserve the source dimensions and export deliberately; do not let a mockup preview become the master.
Avoid inventing a quantitative AI accuracy score for this review. Instead record pass/fail notes: object removed, dependent shadow addressed, perspective coherent, grain consistent and no collateral damage. A colleague can reproduce those checks without possessing the exact software or subscription plan used by the editor.
Deliver an audit-friendly edit package
Export a final visual and keep a layered working document, the untouched original and a before-and-after comparison for internal reviewers. Mark the area that changed with an annotation on the review copy—not on the public final image. Include permission to edit, intended publication context and a sign-off name or role.
In the park example, the repair passes only when pavement seams cross the former cone location smoothly, the cone’s shadow is no longer present and the bench shadow remains. If the editor cannot prove those checks visually, the image remains a draft. An object removal tool should simplify an authorized composition, not silently change what the scene purports to document.
How We Research
We reviewed Adobe’s Remove Tool workflow, processing modes and Content-Aware Fill documentation on October 27, 2026. The cone illustration is a designed example; we did not conduct a software accuracy benchmark. We distinguish product documentation from practical recommendations, use invented examples rather than unperformed tests, and review image claims against the illustrated decision checks.
Frequently Asked Questions
Usually, if the shadow belongs solely to the removed object; keep unrelated shadows intact.
No. Compare methods against the scene and inspect the result.
It can infer plausible pixels, but that is not proof of what was behind the object.
Reject or redo the edit with improved selection and sampling.
Avoid presenting materially altered documentary images as unedited evidence; preserve the original.