
Removing unwanted text from a photo sounds simple until the letters cross brick joints, product packaging, reflections or a person’s clothing. An AI tool can propose matching pixels, but it may also invent texture or erase meaningful evidence. This guide walks through a fictional café-wall image with temporary promotional lettering. It shows how to select the lettering, preserve the original, inspect regenerated background and decide when text should be retypeset instead of erased.
First identify whether the text is yours to change
There is an important difference between removing a graphic you own from a design and removing text that carries a warning, price, copyright notice, credit or provenance claim. For an advertisement or editorial image, altering those elements can mislead viewers. Decide the purpose of the cleanup before opening a generative tool. Keep the original asset and obtain approval if the image belongs to a client.
Our café example assumes the owner wants to remove a temporary “TODAY ONLY” window-style overlay from a licensed photo and replace it with updated copy in a normal design layer. It does not involve tampering with a documentary photo, legal disclaimer or third-party watermark. If the text is on a real product label, consider reshooting or retaining it rather than manufacturing a falsely clean package.
Make a protected editing copy and precise selection
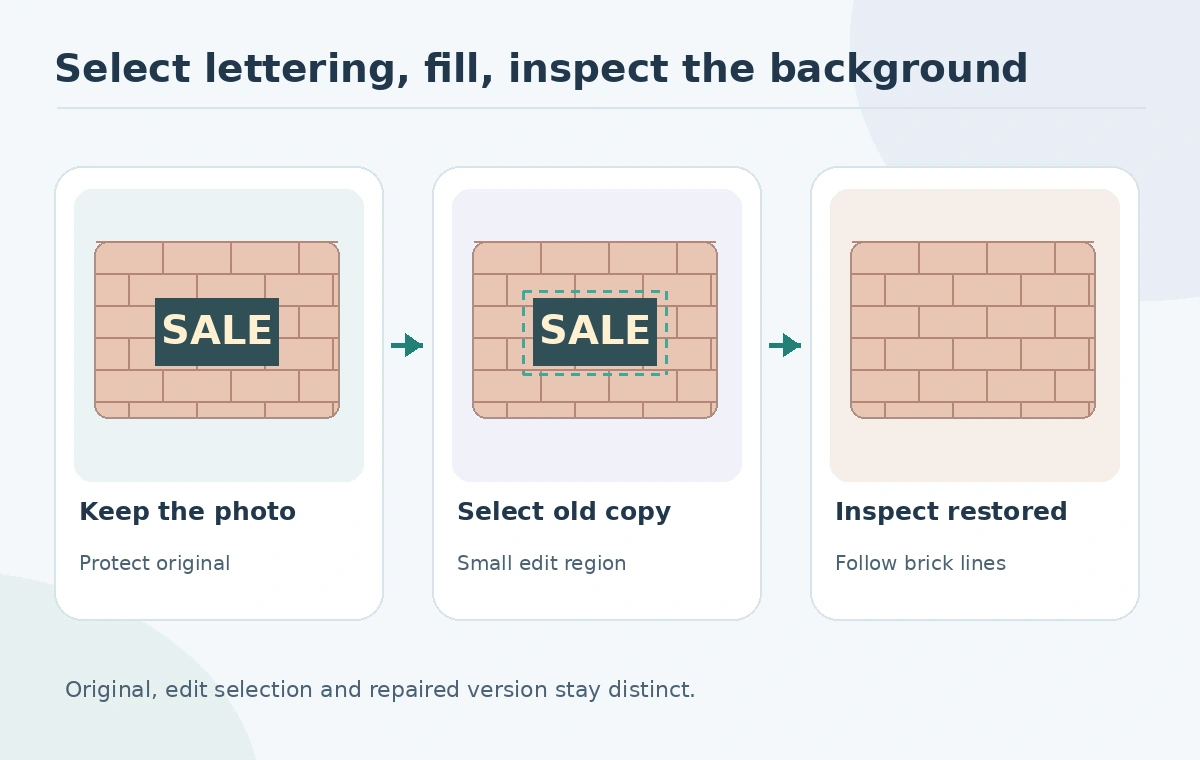
Duplicate the original and work on separate layers or in an editable file. Zoom in to locate the exact glyph edges and nearby texture. Choose a selection that includes the lettering and a narrow, appropriate feathered margin without swallowing unrelated objects. On a brick wall, the selected region may intersect horizontal mortar lines. Preserve the photo’s perspective and lighting; a perfectly smooth rectangle will be conspicuous.
Adobe explains selection-based generative editing as a way to constrain changes to a chosen region. Selection geometry is a major input. Small oversights at this stage can make adjacent details disappear, so compare the target area with the locked original before generating an edit.
Use Photoshop fill or non-generative repair as appropriate
Photoshop documents both Generative Fill and Delete and Fill Selection. Generative Fill can take a descriptive prompt or a blank field for context-aware replacement. Delete and Fill Selection removes a selected item and fills the region using surrounding content. Which tool works better depends on the background complexity and available version.
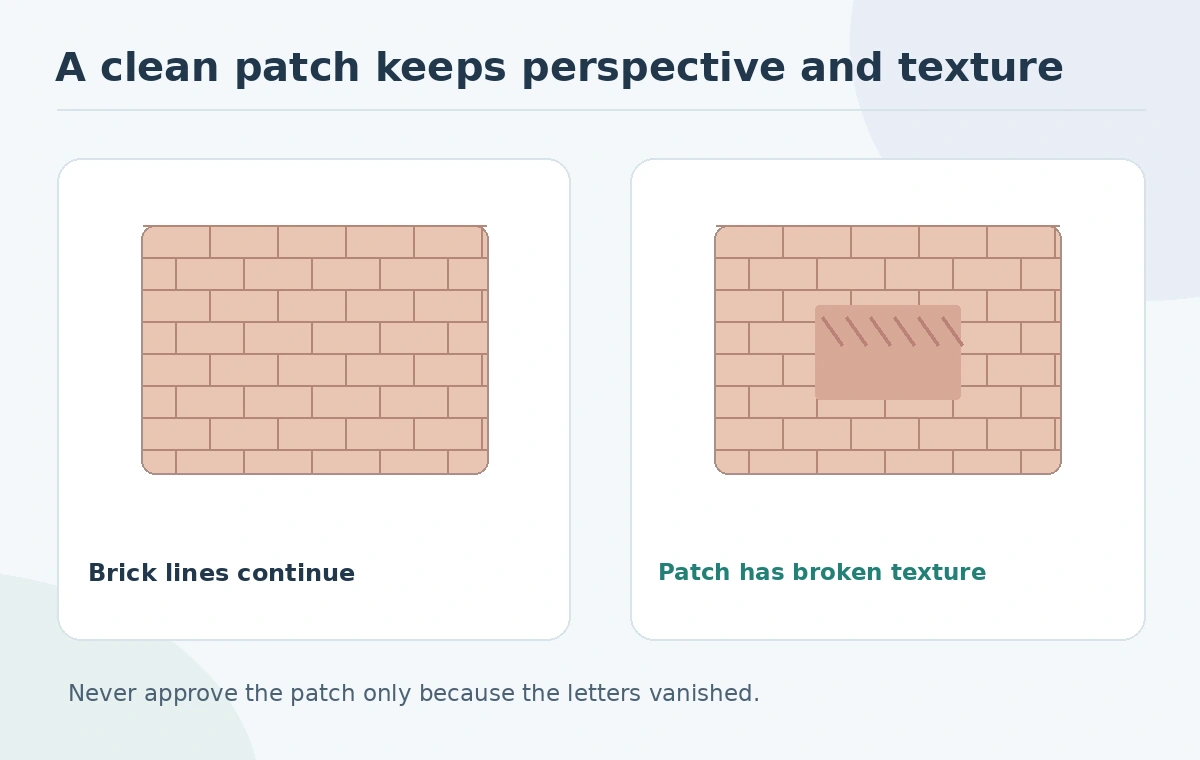
For a regular painted wall, a non-generative repair may be sufficient and easier to inspect. For irregular bricks, a generative suggestion might extend the texture plausibly, but plausibility is not certainty. Preview several edits and never accept the first solely because the word is gone. Ensure the wall’s grout lines, shadow directions and repeating texture continue naturally.
Check continuity, reflections and physical plausibility
Compare at 100% magnification and in the full composition. Follow every mortar line through the former text area; the vertical joints should not bend, duplicate or stop abruptly. Look for cloned stains, inconsistent noise and blurred sections that no longer match the sensor grain. Also inspect any reflections or shadows cast across the selected area. A generated patch can look convincing at thumbnail size while failing a careful crop.
If the sign was attached with a frame, screws or shadow, removing only the letters may leave a nonsensical object. Decide whether the image should retain the sign as a blank surface or remove the entire sign. Write that decision in the edit brief. If the scene is evidence for news, insurance or legal purposes, retain the unmodified image and avoid presenting a fabricated patch as a record of the original scene.
Restore text as a normal editable layer when needed
If the real goal is to update advertising copy, do not ask the generator to paint a complex new headline into brick texture. Fill the unwanted overlay first and place new text using your design tool. Choose a suitable readable typeface, appropriate contrast and correct brand copy. Keeping type editable makes later localization, price changes and accessibility checks much easier.
A useful export set includes a clean photographic background, the source image, an editable composited design and a flattened final image. Check that the new text is still legible on mobile without mistaking the generative patch for verified historical texture. If the campaign spans several crops, test the text margins at every destination size and avoid cutting through the message.

Document authenticity and permission boundaries
An AI-cleaned image may be acceptable as a disclosed marketing composite but inappropriate as unaltered journalistic evidence. Keep an edit log with original filename, edited region, tool, date, purpose and human reviewer. Do not remove watermarks to bypass licensing, obscure legally required notices or hide material product information. When in doubt, obtain a legitimate clean source from the rights holder.
For team use, agree on an approval standard: cosmetic background repair is allowed; material changes to identity, product specification or document content need escalation. Even with a small selection, automated editing can affect meaningful details. The reviewer should compare the final scene to the original, not only inspect the edited area in isolation.
Sign off with a reproducible retouch checklist
The café-wall example passes only when the original is preserved, the intended lettering is fully removed, mortar lines align, shadows remain coherent, the new copy is on an editable layer and publication permissions are documented. It fails if the patch invents a fake window, distorts a product or hides essential information. Treat zoomed inspection and real-size viewing as separate steps.
Save one before-and-after comparison with an annotation pointing to the repaired region. This makes review faster than asking a colleague to guess which pixels changed. Generative text removal is a useful finishing tool when the change is authorized and the background is verified; it is not a license to rewrite what an image originally showed.
How We Research
We reviewed Adobe’s selection guidance, Generative Fill instructions and Delete and Fill Selection documentation on October 27, 2026. The café wall is an illustrated hypothetical example and no retouch accuracy test is claimed. We distinguished documented platform behavior from original editorial examples, avoided unsupported claims about measured performance, and checked the content against the article-specific review gates.
Frequently Asked Questions
Often. A tight selection can focus the edit, but always inspect surrounding texture and shadows.
Undo, improve the selection or use a controlled manual repair; do not accept a visibly incorrect patch.
Prefer an editable text layer when precise wording, brand consistency or translation matters.
Do not use editing to bypass licensing. Obtain an authorized unwatermarked asset from the owner.
No. Retain the original and disclose material changes in contexts where authenticity matters.