
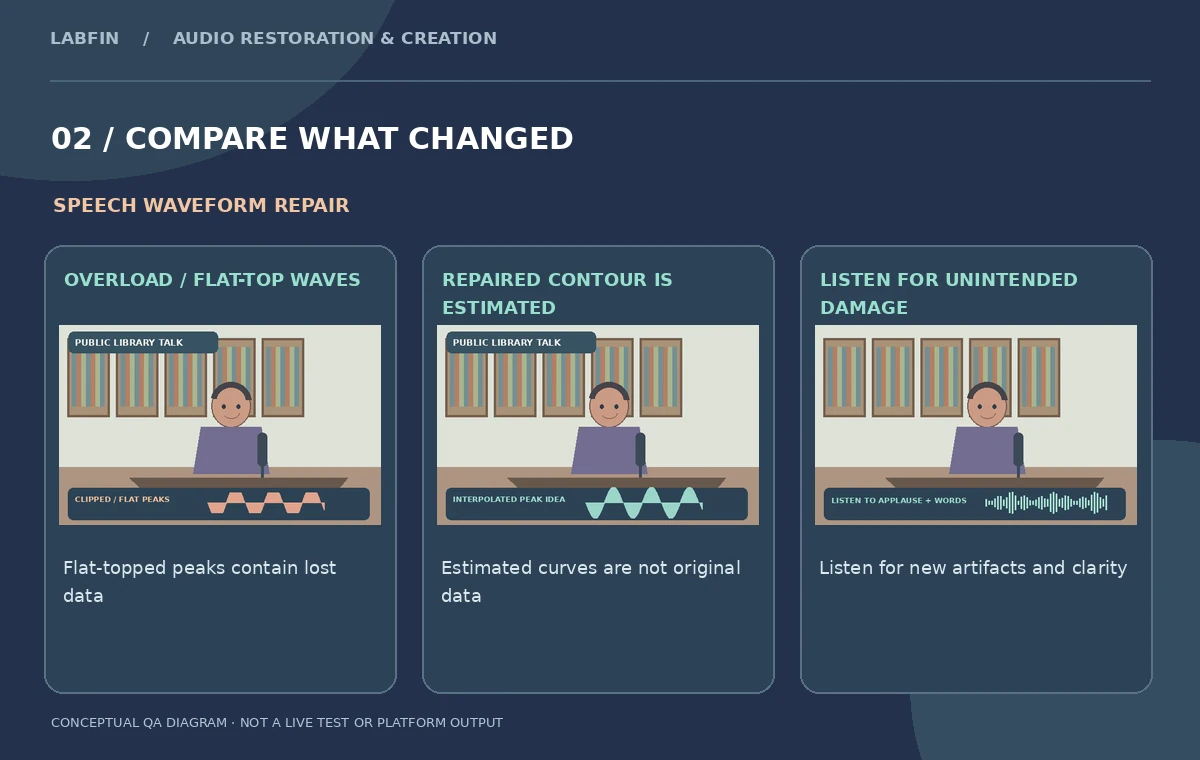
A volunteer records a community talk in a library, and the speaker’s loud welcome sends the recorder’s meter into the red. Lowering playback volume afterward does not undo the hard, crunchy edge on those words. Adobe Audition’s DeClipper in the Waveform Editor Diagnostics tools attempts to reconstruct waveform peaks flattened by excessive recording levels. It is a repair operation, not a trustworthy recovery of every microscopic detail lost during capture. Our fictional example illustrates what a flattened peak looks like, what an interpolated candidate might resemble and where a human must compare the result to the source. The workflow treats intact archival audio as the reference and marks uncertainty rather than claiming a flawless restoration.
Preserve the recording and identify the cause of distortion
Duplicate the source file and keep the original recording at its native sample rate and bit depth. Write down which phrases are affected, whether audience applause is clipped and whether a second microphone or a camera feed has cleaner audio. Distinguish clipping from wireless dropouts, packet loss, plosive blasts and heavy limiting; different defects can sound harsh but require different interventions. Look for repeated flattened waveform tops near full scale and listen for the crackle associated with these peaks. Adobe’s official Diagnostics guide explains that clipping occurs when the input amplitude exceeds the maximum level for the file’s bit depth. Lowering a gain fader makes the distorted recording quieter, but it does not restore the lost waveform shape.
Find the actual flat tops before applying Diagnostics
Open the copied file in Audition’s Waveform Editor, where the Diagnostics effects operate. Zoom into the welcome phrase and find where a rounded speech peak becomes a horizontal ceiling. Inspect both channels: one might have reached full scale while the other remained safe. Mark the most affected sentences so the editor can return to them quickly. The important observation is a pattern of flat-topped samples together with audible distortion, not a magic numerical clipping percentage. Do not normalize the source before diagnosis or remove useful source metadata. If a change to DC offset is needed, Adobe explicitly recommends declipping first because an offset adjustment could move clipped samples away from the detection threshold.

Understand the knobs without inventing a preset
In the Diagnostics DeClipper settings, Adobe documents controls for Gain, Tolerance, Min. Clip Size and Interpolation. Tolerance governs how far below the nominal ceiling candidate clipped regions can be detected; increasing sensitivity too far may treat natural peaks as errors. Min. Clip Size helps exclude tiny runs, while Gain controls attenuation before processing and offers an Auto choice. Adobe describes Cubic interpolation as generally faster, and FFT reconstruction as potentially useful for more severe clipping with greater computational effort. None of those options is a guaranteed best value for every microphone. Record the chosen parameters on a copy, select an appropriate region and compare what changes before processing the entire event.
Make two repair candidates from exactly the same speech
Start with one clearly distorted sentence and produce a restrained candidate using one plausible detection setting. Keep that untouched comparison loop. Then create a second candidate with a different sensitivity or interpolation method to discover whether the perceived improvement is stable. Level-match all three for listening; a louder processed waveform can sound clearer while still containing grating artifacts. Inspect the reconstructed top contour as a clue, not as proof of recovered truth. If a phrase remains unintelligible, the repair cannot authorize guessing its missing words. The diagrams in this guide intentionally show stylized waveforms; they do not report real samples from a library recording or test result.
Protect consonants and the sound of applause
Speech and applause contain rapid transient peaks, so a repair that softens the distorted greeting can also round legitimate attacks elsewhere. Compare p and t consonants, short handclaps, the initial syllable of a name and the transition from quiet speech to a loud response. Listen in context rather than judging only a single clipped millisecond. Hard crackles that remain after DeClipper may have been caused by a different recording problem; avoid repeated passes that replace more and more of the original. Where the event has an alternate safe channel, a careful edit from that real source might be superior to reconstruction. Such a substitution should preserve timing and event continuity.
Restore headroom and check the output signal
After a conservative declipping pass, set an appropriate output level without merely pushing the waveform back to full scale. Peak meters are helpful, but true perceived clarity is tested by listening to a voice over the intended publishing system. Adobe documents a limiting approach for preserving controlled amplitude after repair; do not confuse its illustrative settings with universal broadcast or podcast delivery requirements. Check the house mastering specification separately. Compare quiet and loud phrases together to avoid a revised edit that makes the audience jump in volume. Export a proof copy and look for new clipping introduced by a downstream effect chain or export conversion. Always keep a readable version history.
Verify words, dates and continuity against the intact source
An event recording is evidence of what the speaker actually said. Listen to the edited introduction while reading a transcript checked against the untouched source or an independent recording. Repair processing can alter short consonants enough to change a surname or number, and a visually smooth peak does not settle that question. If a quote is central to a public claim, mark the passage for human review and preserve the original timecode. Captions should not be adjusted to fit an uncertain reconstructed sound unless an authorized transcript confirms the words. Do not relabel a clipped section as a clean recording or claim scientific recovery of lost acoustic information. The repair must remain reversible and clearly documented.

Prepare an honest delivery note and prevention plan
Bundle the source, repaired candidate, approved master, short clipping map and DeClipper settings with a plain-English note about remaining limitations. If the event will be archived, retain the damaged original as primary evidence even if the edited file is more pleasant to hear. For future library talks, test microphone placement, leave enough input headroom for applause and unexpected laughter, and monitor for red peak indicators during a rehearsal. Some distortion can be reduced after recording, but a lower input level at capture remains safer than trying to reconstruct every overloaded syllable. Editorial quality means making listeners more comfortable without exaggerating what was recovered.
How We Research
This Adobe Audition DeClipper guide is independent editorial guidance grounded in official documentation: Adobe Audition Diagnostics effects; Adobe Audition clipping and DeClipper options. The illustrated scenario is a fictional public-library community talk recorded too hot on a portable microphone, with a clipped welcome and applause. We checked the vendor-described capabilities and important eligibility conditions, then mapped a sequence of editorial reviews that readers can repeat with their own authorized media. The images are original teaching diagrams, not product UI screenshots, generated exports, results of a live account test, or measured benchmarks. We did not upload private recordings, access a paid vendor account, run a real A/B experiment, measure performance, or verify hypothetical timecodes. Retain source assets, check current plan availability and privacy settings, and review exported media and metadata before publication.
Frequently Asked Questions
The DeClipper lives in the Waveform Editor Diagnostics effects described by Adobe.
No. Lower volume reduces playback amplitude but does not restore waveform peaks already flattened during recording.
Adobe describes Cubic as faster in many cases and FFT as an option for more severe damage; compare results on your source.
Adobe warns that moving clipped samples away from full scale can make DeClipper miss them.
No. It estimates damaged peaks; verify speech independently where accuracy matters.