
A textile museum photographs a patchwork quilt before a temporary exhibition. A charging cable slips into the lower corner of the image, crossing a pale seam. Adobe Photoshop can find wires and cables automatically through the Remove tool’s Find Distractions controls. The goal is not simply to make the cable disappear: the image must still show the real stitching, fabric texture, maker’s label, and condition of the object. This hypothetical guide treats AI cleanup as a reversible proposal requiring close inspection, not as evidence that a fabric detail really existed.
Define what must not change in the source image
Before opening a cleanup tool, keep the camera original and record its file name, capture date, color profile, and approved crop. For a collection image, distinguish removable studio clutter from visible object condition. Dust on a background sweep may be acceptable to retouch; a frayed edge, missing stitch, discoloration, or conservation repair belongs to the object record. Make a list of protected features, including the diagonal white seam, hand embroidery, border shape, and any signed label.
A wire crossing a seam creates a high-risk editing zone because Photoshop must predict what sits behind the obstruction. It may produce attractive pixels without reconstructing the historical stitch placement. If conservation documentation rather than promotional photography is the purpose, consider leaving the cable visible with a separate clean reshoot. Agree with the curator which kind of image is being produced before allowing a generative or content-aware replacement.
Open the Remove tool on a separate working layer
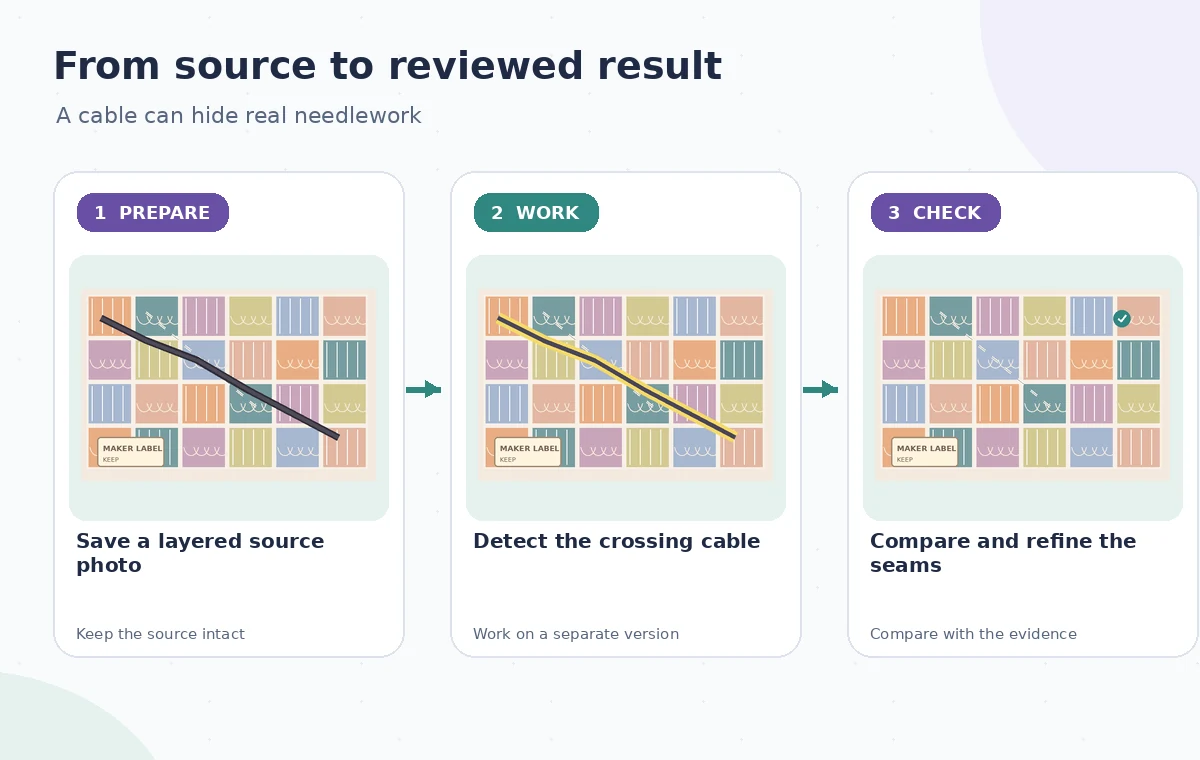
Adobe’s desktop Photoshop instructions describe opening the image, selecting the Remove tool, then choosing Find Distractions in the Options bar. The available choices include Wires and cables, People, and General distractions. For this scenario, use Wires and cables: the unwanted object is a power cable, not a visitor and not an invitation to erase every unusual texture in the frame. Inspect the detected region before accepting any wider edit.
Use a duplicate document or a separate retouch layer so the original remains available for comparison. Adobe also documents a Create new layer control and Sample All Layers behavior for certain Remove workflows. Confirm the relevant options in the version you actually have. A screen illustration here is deliberately conceptual; menus, processing modes, and local-versus-cloud generative options can change with application updates and device support.
Narrow the edit around the actual cable
Choose Find Distractions and then Wires and cables according to Adobe’s documented route. Rather than trusting the first result blindly, check whether the tool interpreted a dark embroidered line, quilting thread, or hanging strap as a second wire. If the selected region includes original artwork, use the available refinement or a smaller manual Remove stroke instead. The aim is to limit interpolation to the foreign object and its narrow shadow.
Work from a clean section of the photo and use actual repeated fabric motifs as reference. For patterned textile material, a stitched diagonal is not just a straight line: stitch gaps, thread direction, and small irregularities identify real handwork. Do not paint in an invented chain of identical stitches merely to make the edit look polished. If the wire masks a crucial inscription or damaged area, leave that section unedited and arrange another photograph.
Use the AI tool selection checklist
Compare the repaired seam against adjacent real fabric
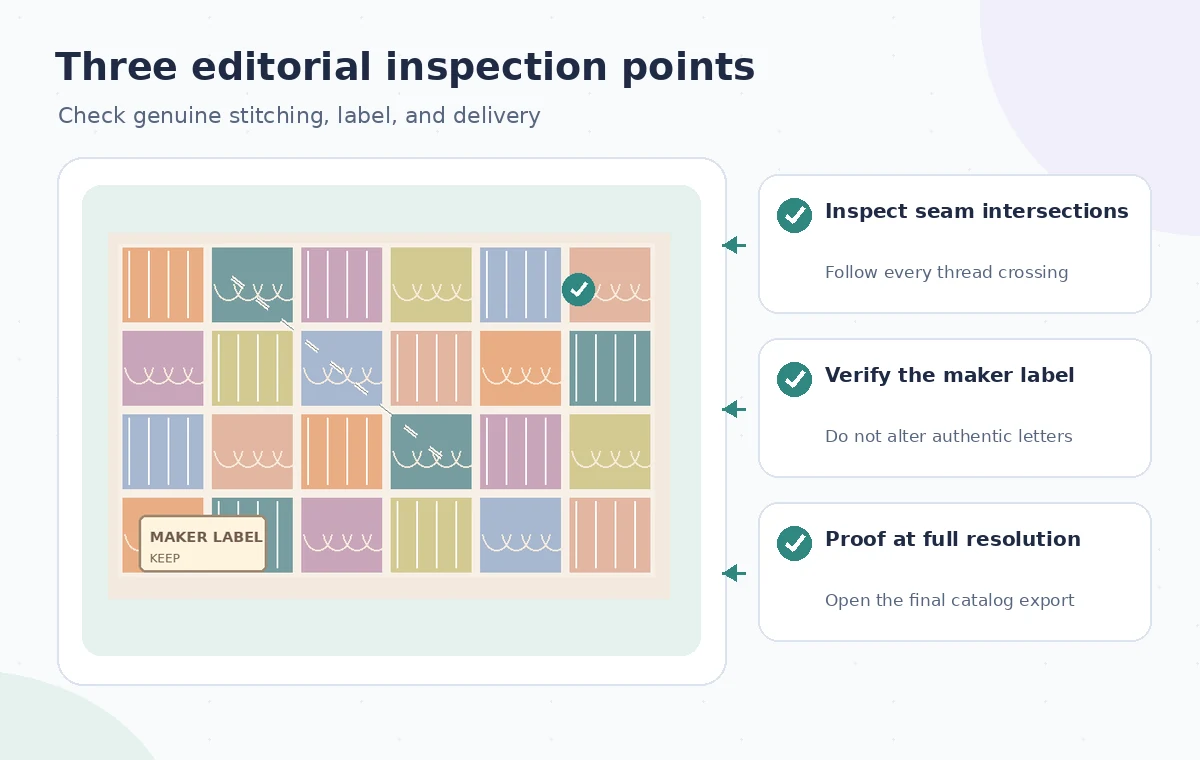
View the untouched photograph and the edited layer at the same scale. Follow the seam through the repaired region, checking whether the stitch direction changes abruptly, the thread thickens, or a fabric square gains an impossible edge. Toggle the correction on and off rather than comparing two differently cropped previews. A good patch should not make the quilt more symmetrical or newer-looking than the original artifact.
The before-and-after graphic shows a hypothetical failure: the cable disappears but one seam segment is silently replaced by a blank strip. Its corrected panel illustrates a conservative review target rather than an actual Photoshop render. This is why quality control must focus on physical continuity, not on how confidently the tool reports that it removed a wire. A beautiful image can still misrepresent the object.

Handle text, provenance, and edge details separately
Protect the maker’s woven label and any inventory ruler in the photograph. Tiny characters are especially vulnerable to hallucinated repairs and compression, so avoid running Remove across them. If a cable obstructs the label, create a second documentary image with the label fully visible rather than guessing the hidden letters. If you create a promotional crop, retain its relationship to the original inventory photograph and note that the background was retouched.
Check the quilt border where the dark cable may merge with edge piping. A removal can accidentally straighten the border or duplicate a motif near the corner. Compare control points on both sides of the edit: seam intersection, embroidered flower, fabric grain, and shadow direction. Keeping these anchors visible helps a reviewer determine where retouching should stop. Do not reclassify a genuine repair patch as distracting clutter.
Plan a safer multi-tool workflow
Export both an edited image and an audit trail
Save a layered working file, the source camera file, and a flattened delivery image with names that clearly distinguish them. Open the exported full-size image in an independent viewer; check seam continuity, color shifts, residual cable fragments, and compression artifacts. Also inspect the thumbnail used on the website, where a repaired seam may turn into a pale blur. Keep the pre-edit version accessible to collection staff.
An editorial sign-off can include the two versions side by side plus a short disclosure such as ‘background cable digitally removed; textile condition unchanged’. The exact disclosure policy belongs to the institution. If the project is a conservation or forensic record, don’t replace evidence with a cleaned-up promotional photograph. Rechecking the final export is more reliable than assuming an editor preview represents the delivered pixels.
Know when a reshoot beats an automatic removal
An unobstructed reshoot is usually preferable when the cable covers a label, significant stitching, or evidence of damage. The AI tool can propose a plausible fill but cannot recover authentic hidden thread geometry. A conventional patch, careful crop, or new photograph may provide a more honest solution. Use Photoshop primarily for reversible housekeeping that a reviewer can evaluate against the source, not for restoration claims it cannot substantiate.
This guide does not report tested accuracy, an Adobe account session, or an actual museum edit. It relies on Adobe’s published controls and translates them into a task-specific editorial procedure. Confirm the installed Remove tool behavior and the institution’s image-treatment policy before work begins. The general rule is durable: protect the record, constrain what is removed, compare at 100 percent, and disclose substantive retouching where necessary.
How We Research
We checked the named vendor documentation: Adobe Photoshop: Remove wires, people, and general distractions and Adobe Photoshop: Remove objects and choose processing modes. We compared its stated user controls, availability warnings, workflow stages and limitations against the concrete scenario described here. We then developed original educational diagrams and a separate human-review procedure for the materials that need independent evidence. The scenario is hypothetical: we did not sign into a paid account, upload a real customer asset, operate the feature on the example, or measure output quality. The figures are schematic, not actual interface captures or recorded processing results. Product menus, permissions and plans can change; verify the current installed edition and applicable policies before relying on this method.
Frequently Asked Questions
Adobe documents it under the Remove tool in the Options bar or contextual controls; select Wires and cables for this particular obstruction.
Adobe describes automatic wire and cable detection. The detected region and output still require review, especially where stitching resembles a cable.
No. A generated replacement may look plausible while changing real textile details. Compare the edited layer with the camera original.
Prefer a new photograph. Do not reconstruct obscured maker names, inventory numbers, or provenance from generated pixels.
Keep the original photo, a revisable working file, a checked export, and a short record of any retouching and approval.