
A community garden needs a small catalog graphic showing its pruning shears against a plain background. The source image has a thin metal blade, curved grips, and visible gaps inside both handles. Cutting the tool out by hand is tedious; selecting too much of the background is also easy. Microsoft Paint’s AI-powered Object Select can recognize an object on a canvas, but recognition is only the start. The editor still has to decide whether the resulting silhouette is accurate enough for a public-facing tool guide.
Check the hardware and the exact feature
Microsoft documents Object Select among the Copilot+ PC features in Paint on Windows 11. It says to update Paint through the Microsoft Store; the relevant device class matters because a conventional Windows laptop may not show the same option. Open the installed app and look for Object select in its toolbar before planning a workflow around it. Do not confuse that tool with a basic rectangular selection, Paint background removal, or the separate generative-fill experience.
The support page describes AI identifying individual elements when the pointer hovers over them, then letting the user copy, move, or erase the selected object. Those are product capabilities, not a guarantee that every intricate edge survives. For this scenario, agree in advance that the inner openings of the shears must be visible, both cutting tips must remain, and no extra garden-fence fragments should be carried into the finished catalog illustration.
Preserve a trustworthy source before making edits
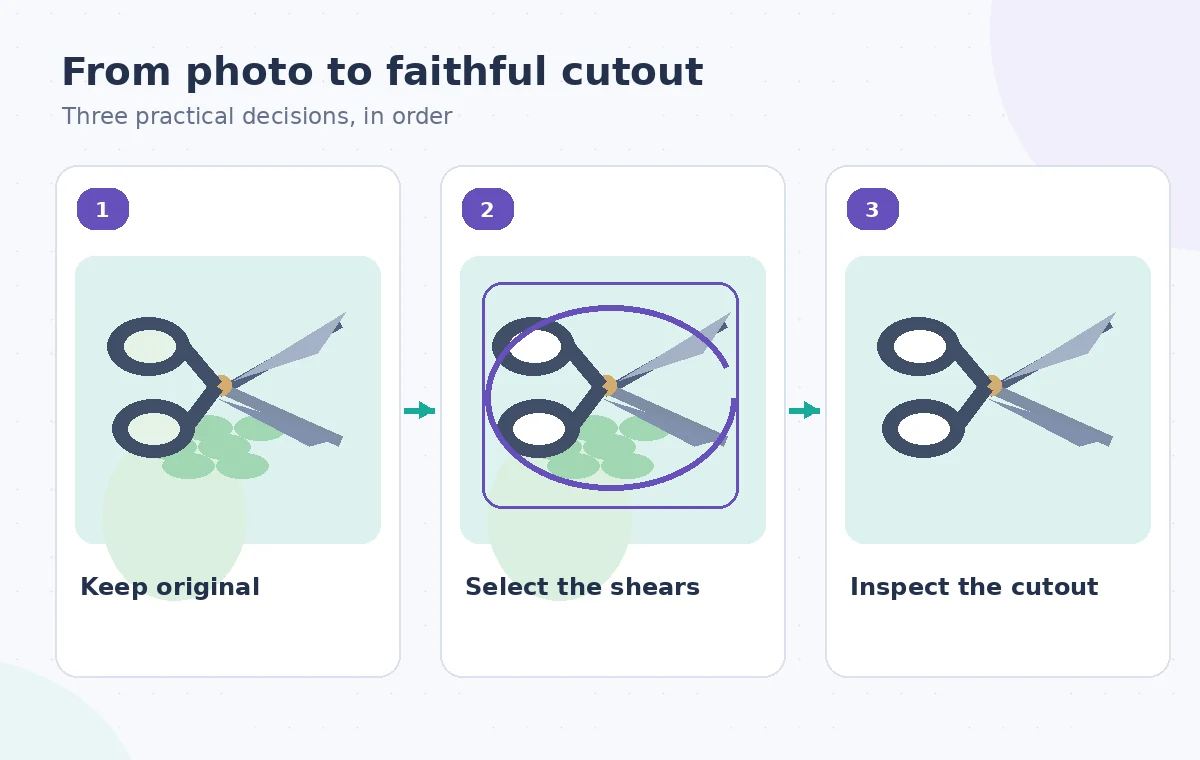
Save an untouched copy of the photograph in a source folder with a descriptive name and date. Keep the edited artwork in a separate working location. It is tempting to move the shears inside the only copy of a picture and save over it, but that destroys the comparison needed to find an accidentally clipped handle. If the photo is part of an inventory record, retain the original metadata and context alongside the final graphic.
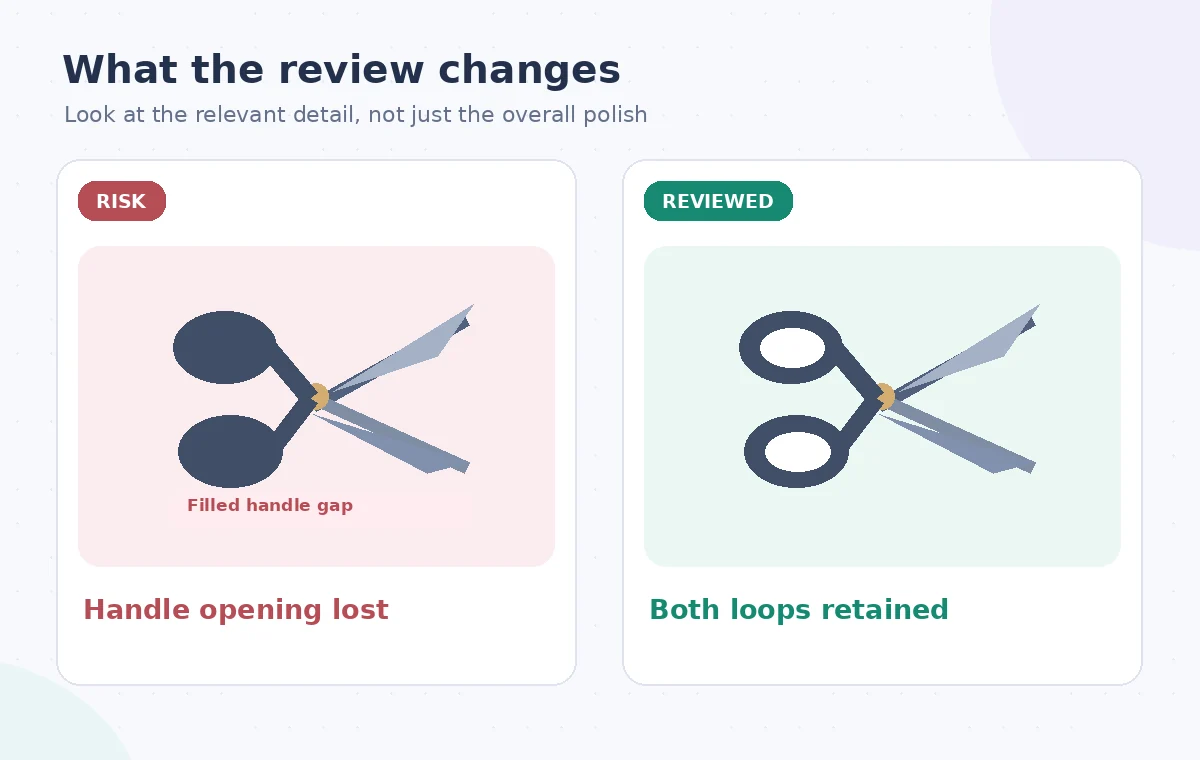
Inspect the original at full size first. Identify where the dark grip overlaps a similar dark shadow, where one metal tip blends into a pale table, and where the empty holes inside the handles reveal the background. These are the difficult boundaries for any automatic selector. A cutout that looks fine at thumbnail size can still contain a solid dark patch where a real grip should have an open center.
Make the first object selection in Paint
Open the copy in Paint and choose Object select from the toolbar when the feature is available. Hover over the shears and examine the highlighted object before clicking to select it. If the tool selects the table or a neighboring hand tool instead, change your pointer position and try a clearer part of the intended object. Avoid interpreting a highlight as a verified mask; inspect what was included, especially around the two handles and narrow blades.
Copy the selection into a new working canvas or another appropriate image layer in your composition. Place a plain contrasting background behind it so that dark gaps, bright metal edges, and unwanted remnants are easier to detect. The goal is a faithful product silhouette, not a new object invented by a model. If the selection is inadequate, revert and perform a more controlled manual edit rather than claiming Paint reconstructed hidden geometry.
Use the AI tool selection checklist
Inspect the smallest openings and reflective edges
Zoom in until you can distinguish the handle openings from the rim of the grips. Check each opening against the original, not just against the opposite handle. A selection may keep the outside perimeter while incorrectly filling the interior with opaque pixels. Pay equal attention to the point where the two blades meet and the narrow highlighted edge on the upper blade; feathering can soften that edge into a misleading shape.
Check the background just outside the object too. A small patch of the wooden bench might follow the lower handle, creating an apparent extra spur. Switch the canvas between a pale and dark backdrop to expose both light halos and dark fragments. If a defect is present, correct it with a suitable manual selection or prepare a cleaner photograph. Do not smooth away the distinctive handle profile simply to achieve an apparently cleaner contour.
Move the shears without fabricating what was behind them
If the final design only needs a cutout on a neutral background, copy the isolated shears to the destination and leave the source scene alone. Moving or deleting the tool inside a documentary image raises a different question: the pixels formerly hidden behind it were never photographed. Any automatic filling of that area is a plausible illustration, not factual evidence of the actual bench surface beneath the tool.
For a garden inventory sheet, label the final graphic as an edited product illustration if the background has been replaced. Do not reuse it as evidence of where tools were stored, which equipment was present at an event, or whether a safety inspection was completed. If the shears include a brand or serial mark, verify the letters against the original photograph and avoid AI edits that could silently replace them.
Plan a safer multi-tool workflow
Check scale, sharpness, and export behavior
Resize only after the silhouette is accepted. For a web catalog, export an image at the site’s required pixel dimensions, ideally with an appropriate background or transparency if your destination supports it. Do not stretch a small source beyond the detail that it actually contains. Compare the edited output with the original at the final display size and at close zoom because scaling can hide one error while introducing another at the blade tips.
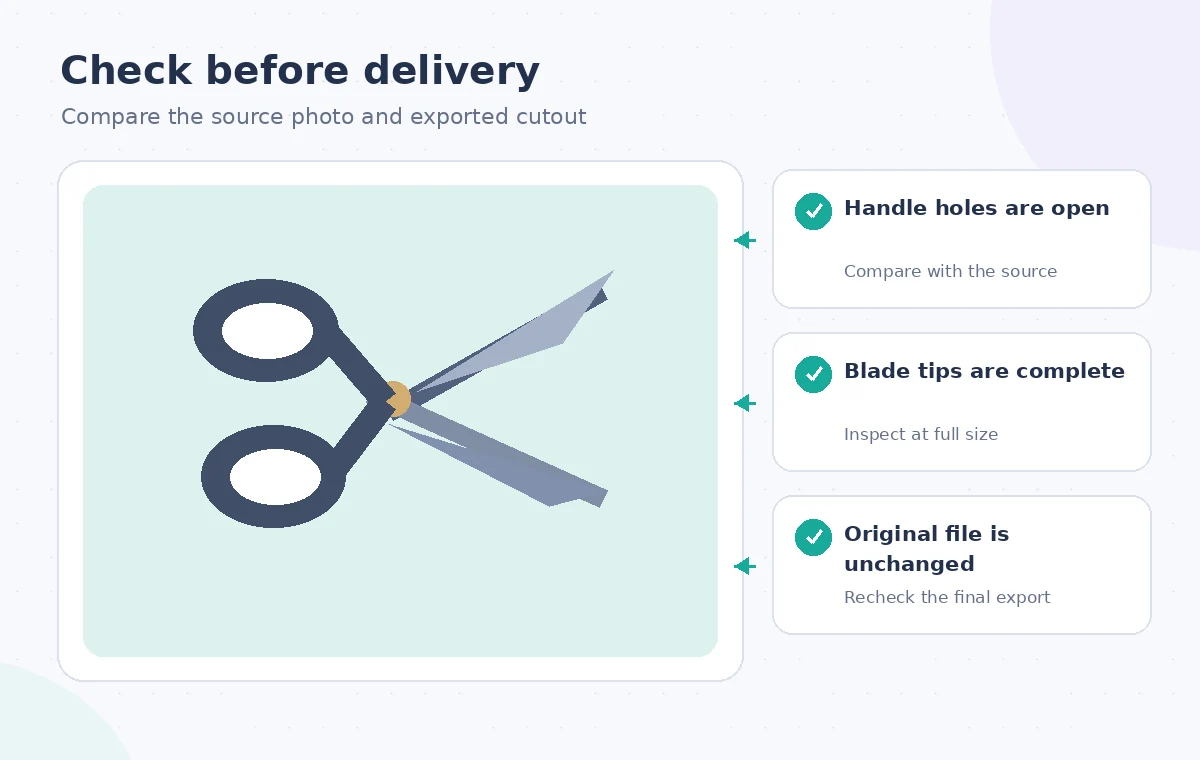
Reopen the exported file rather than evaluating only the Paint working canvas. Confirm that the inner handle holes remain open, the background is not unexpectedly flattened, and the shears have not shifted outside the safe area. Save a version that can be revised later. A visually convincing preview is not the same as a correctly exported asset in the file format used by the catalog.
Document where automation helped and where it did not
A useful short production note might say that Object Select provided the initial tool selection, with a manual visual review of both handle openings and blade tips. That phrasing is more informative than declaring the cutout perfect or entirely AI-made. Keep the original alongside the finished asset so another editor can independently compare the silhouette and decide whether more detailed edge correction is warranted.
Object selection is a convenience, not a product-authenticity check. If the photograph is too blurred to establish the exact contour, a model’s confident outline cannot settle the question. Photograph the tool again against a contrasting surface or use an explicit vector drawing for instruction. The best outcome here is a clear catalog illustration whose visible properties are traceable to the source, not the maximum amount of automatic processing.
How We Research
We consulted Microsoft Support: Use Copilot+ PC features in Paint. We compared the named capabilities and limitations against the workflow described here, then designed an independent source-preservation and human-review checklist. This is a hypothetical teaching example with original explanatory illustrations, not an account-based hands-on test, measured output, or actual software screenshots. We did not process real customer files, verify a subscription on a live account, or claim that a vendor certified the final result. Confirm the installed version, applicable permissions, current licensing, and site-specific requirements before following the steps.
Frequently Asked Questions
No. Microsoft lists Object Select in its Copilot+ PC Paint feature documentation for Windows 11; update Paint and verify the tool on the device you actually use.
It identifies and selects an object. The editor must inspect the resulting boundaries and use an appropriate canvas or export workflow for the final graphic.
The thin blades, reflective edges and hollow handle openings can be lost or confused with a similarly colored background.
You can edit imagery, but any newly filled background is not proof of what was physically behind the tool. Preserve the original for factual use.
Reopen the export, compare it side by side with the source, inspect both handle holes and blade tips, and confirm there are no leftover background fragments.