
A community shelter needs a clean photo for its volunteer bulletin. A stray power cable is distracting, but the posted phone number and evacuation notice must remain exactly as photographed. This guide treats every example as a hypothetical editorial exercise, with human review of the underlying facts and a saved original before changes.
Decide what is allowed to change
The goal is to remove one cable from a photograph of a fictional neighborhood shelter, not to redesign the building. Create a short edit brief: erase the cable where it crosses the plain wall, preserve the entrance, and leave the notice and telephone number untouched. The original should be retained with its capture details. If the image documents an emergency or a condition that the public needs to know about, an altered version may be inappropriate. For an ordinary promotional bulletin, note the retouching in the asset record and do not suggest that the illustration is an unmodified documentary image.
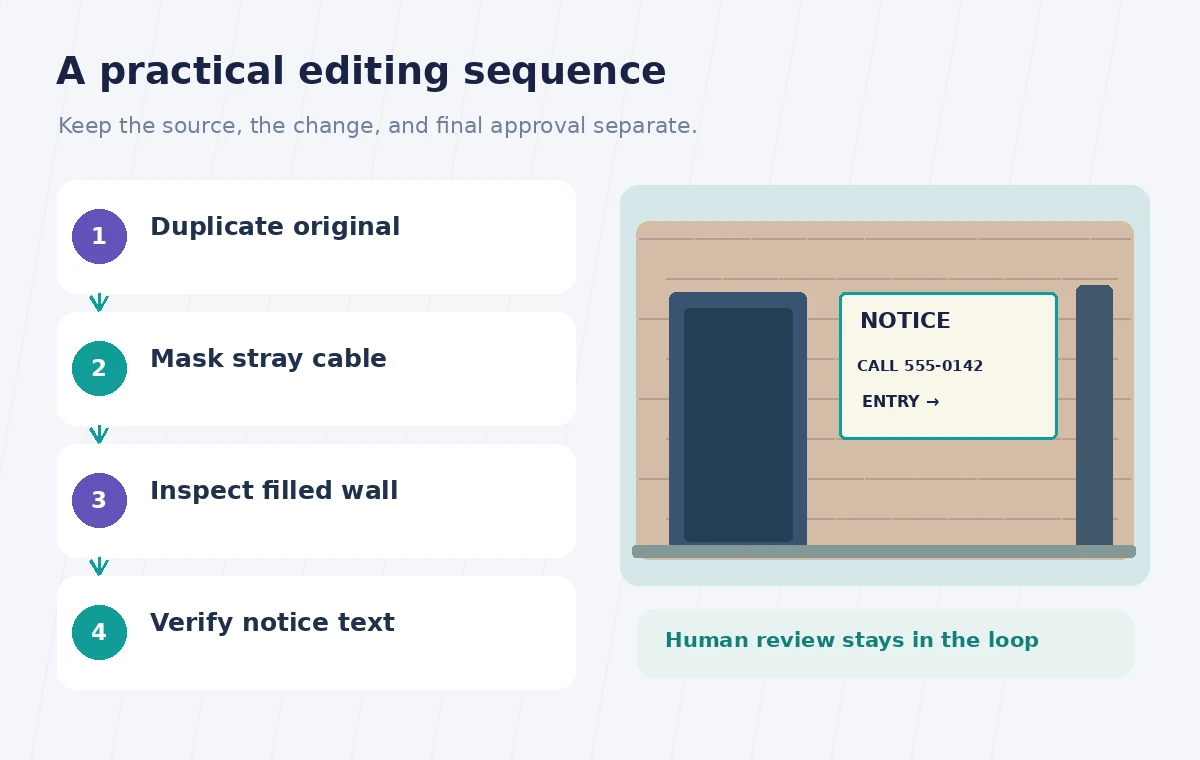
Open Designer and make a protected working copy
Microsoft’s Designer documentation describes Generative erase as an image-editing action, with Quick select to target an object and Brush select for manual masking. Access can vary with the application, sign-in, device, and supported language. Confirm that the editing experience actually displays the feature before relying on a tutorial’s older menu path. Duplicate the picture at its original size, name the working version clearly, and keep the unedited file outside the project. Do not replace the sole evidence of the original wall or sign with a generated fill.
Make a narrow selection around the cable
Start with the part of the cable that lies on visually simple brick. Inspect the mask at a useful zoom level. A broad brush around an entire doorway may include features you never intended to alter, while an extremely tight mask can leave a dark fringe. Microsoft’s help distinguishes Quick select from Brush select and offers Start over when the mask is wrong. Use those controls to refine the target rather than erasing the poster, doorframe, or characters adjacent to it. Treat the sign as a protected exclusion area, not a convenient region for a large automated fill.
Review the generated texture instead of accepting it blindly
After running Erase object, Designer proposes modified pixels to replace the selected area. A believable surface is not proof that it matches the original building. Scan the entire former cable path for repeated brick seams, duplicated mortar lines, stretched shadows, and painted-over hardware. Compare the exit sign and its edges against the untouched copy. If the result includes even one changed digit, do not patch that digit by guessing; revert and use a smaller mask away from the sign. The looks-good confirmation is a user acceptance control, not an independent factual verification.
Use a two-panel comparison to catch hidden damage
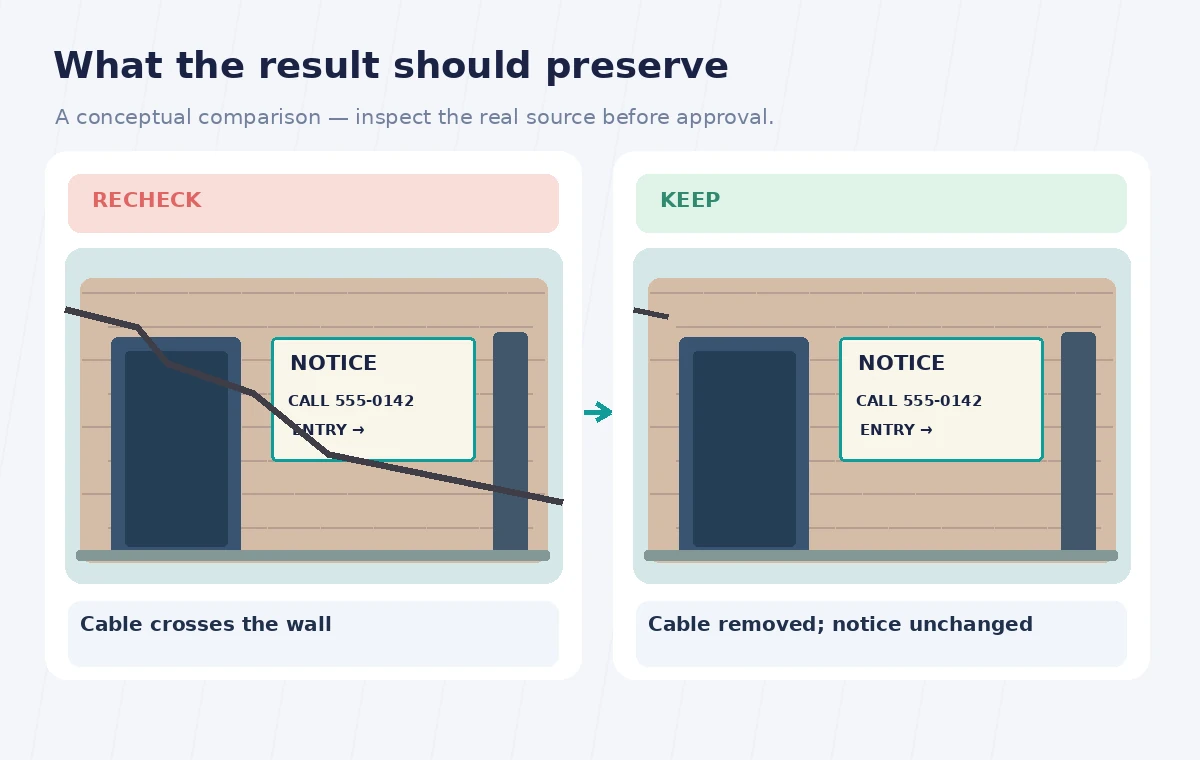
Open the source and edited image at the same magnification and crop. Move systematically from the top of the cable to its bottom, checking both the repaired surface and neighboring objects. In the teaching diagram, the corrected state keeps the notice rectangle and all printed characters stable while the cable disappears from the wall. These drawings are illustrative, not before-and-after exports from Microsoft Designer. For a higher-risk public notice, retain a separate unretouched detail of the sign and compare line breaks and every number character by character.
Keep the published image honest
A promotional photo may be aesthetically cleaned while a contemporaneous incident record should generally stay intact. Ask the shelter coordinator to decide whether the visible cable conveys relevant information about facility safety. If it does, either use the original or provide the modified illustration with a clear disclosure in adjacent copy. Do not use Generative erase to hide a hazard, occupancy limit, damage, or other fact a visitor may reasonably rely upon. If an image contains people, get the necessary photo permissions and avoid placing their faces inside a broad generative selection.
Export for legibility, not just for appearance
Check the proposed banner, desktop thumbnail, and mobile crop. The safety notice may be readable in the high-resolution source but become illegible after the image is placed in a small card. If the notice contains essential instructions, publish that text separately as accessible copy rather than making the photograph carry the entire message. Keep the source image, approved edited file, and reviewer notes with version dates. A quiet image that is technically clean can still miscommunicate if the crop hides the only entrance or makes a critical sign look optional.

Run a final three-point release check
Before release, have a reviewer who did not make the edit examine the phone digits, the masonry repair, and the remaining edge of the removed cable. Inspect the exact output file, not just a preview inside the editor. Record the choice to accept or reject and the reason, especially if a protected region came close to the mask. If any uncertainty remains about a safety-related feature, use the untouched photograph. The practical win is a more usable image without silently substituting AI-invented details for verifiable information.
How We Research
We reviewed the official Microsoft Designer FAQ and Edit images with Designer documentation on November 1, 2026. We checked the stated feature controls, prerequisites, limitations and practical failure cases against the sequence above. Availability and plan terms can change, so readers should consult the live help before using the tool. The organization, names, records, photos, numerical examples and diagrams are fictional. We did not run a live account test, upload a real person’s materials, or measure model accuracy. Suggested comparisons are editorial verification procedures, not claimed empirical results.
Frequently Asked Questions
No. The model modifies selected pixels and nearby context; verify every important letter and digit against the original.
Choose Brush select when an automatic object selection approaches the poster or doorway and you need a narrower mask.
Do not present a modified image as unaltered evidence. Retain the original and disclose relevant changes.
Undo or start over, reduce the selection and inspect the seam at full resolution before accepting another result.
No. Microsoft lists sign-in, internet and supported language considerations; check availability in the current application.