
Removing the background from a product photo should make the object easier to see, not quietly alter what the customer is buying. A ceramic lantern with a thin curved handle is a good stress test: a coarse selection may crop the handle or fill its center as solid material. Photoshop Select Subject provides a quick starting selection, but intricate product edges still need human inspection and, sometimes, manual refinement.
This article uses an invented handmade lantern to illustrate a repeatable editing workflow. The illustrations are original diagrams, not screenshots of Photoshop results or measured segmentation accuracy. The practical aim is to keep the lantern’s silhouette, handle opening, and surface features faithful to the source photograph.
Photograph the object before opening Photoshop
Start with a sharp image that clearly separates the ceramic rim from the surrounding background. Use even light that reveals the handle’s outline and avoids a shadow that merges the loop with the lantern body. Capture a second reference angle if the handle’s shape is hard to read from the main product photo.
Keep the original untouched. The editor should know whether a dark area inside the handle is genuine empty space, a reflected shadow or another object behind it. Automatic selection sees image patterns; it cannot confirm the product’s three-dimensional construction from one ambiguous photograph. A reference shot can prevent a plausible-looking but physically incorrect cutout.
Start from the correct image layer
Adobe documents Select Subject as a quick action from the Discover panel, available through Search, Help, or keyboard access. The action operates on the active layer. If your file includes a duplicate image, adjustment layer, or a preliminary mask, select the intended image layer before running the operation.
In the Discover panel, choose Quick Actions, then Select Subject and Apply. Photoshop produces an active selection around a prominent subject. It may choose the largest or most central object if several objects appear, so do not assume the chosen selection corresponds to the lantern just because a dotted outline appears on screen.
Evaluate the whole silhouette before refining details
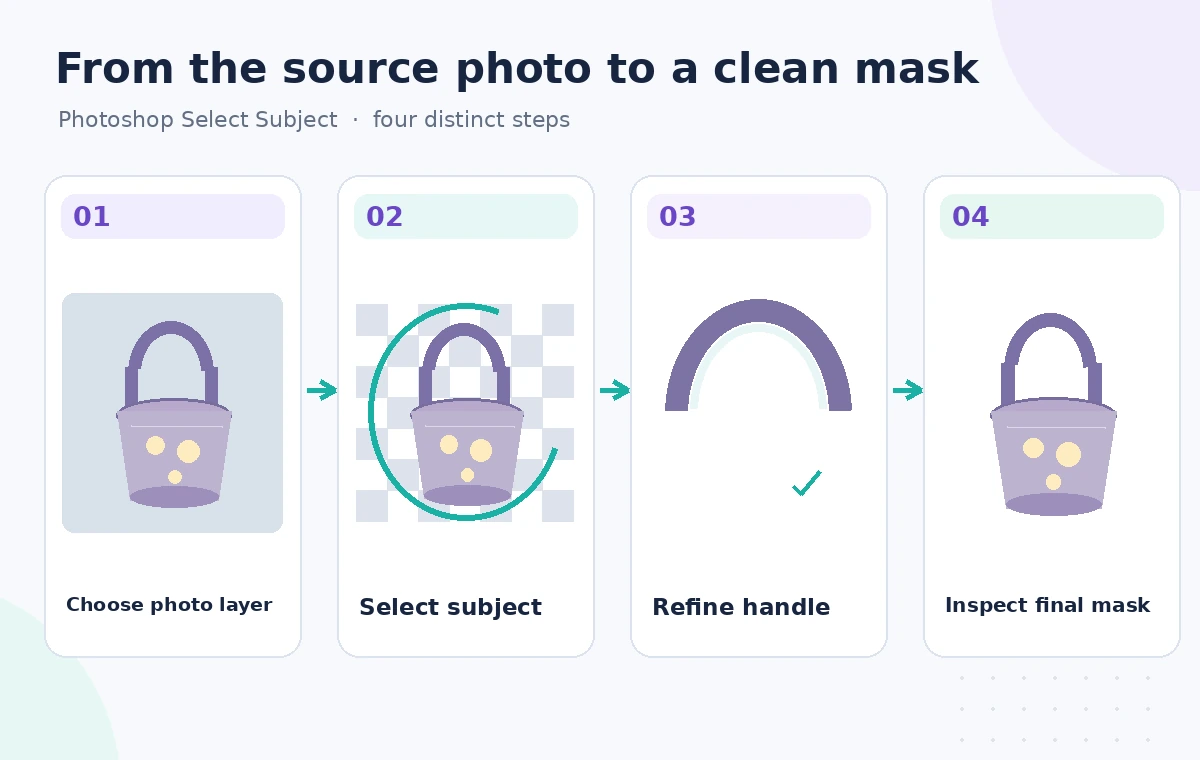
Zoom out first. Does the selection include the body, base, spout if present, and both ends of the loop handle? Is the outer silhouette continuous? A lantern isolated at thumbnail size can look reasonable even when a critical 8-pixel segment disappears. Compare the selection to the full original photograph, not to your visual memory of the object.
Then zoom in around the handle opening, the narrow attachment points, and the uneven glazed rim. Inspect the selected region for accidental background islands. In the conceptual diagram, the inaccurate result clips the loop into two disconnected pieces. The reviewed version keeps both attachments and leaves the inner space transparent.
Convert the selection to an editable mask
A non-destructive layer mask lets you refine the edge while retaining original pixels. Adobe explains that a Select Subject selection can be refined through Select and Mask or turned into a mask for compositing and adjustment work. Avoid erasing the source image simply to make a rough automated edge look permanent.
Save a working file with the unaltered layer and the mask. If you need to show alternate product backgrounds, duplicate the composition or create separate visible versions rather than baking every background change into the same source layer. Keeping an editable mask makes later corrections possible without regenerating any ceramic detail.
Repair the narrow loop and inner negative space

The handle’s interior opening is a *negative space*: it should show whatever background is behind the product. A selection algorithm may mistakenly fill that area, especially if the original backdrop is similar in color to the glaze. Use mask refinement tools to remove the interior region while keeping the outer loop intact.
Examine attachment points where the handle joins the lantern. A repair that preserves the top arc but disconnects one side makes the item appear broken. Work with small, controlled adjustments and compare against the untouched photo after each pass. Do not invent a more symmetrical handle just because the real handmade object has minor irregularities.
Test the edge against two contrasting backgrounds
Place the masked lantern over a light neutral background and a dark neutral background. The contrast reveals light halos, dark fringing, transparent chips, and rough transitions that a single matching backdrop can conceal. A clean mask should preserve the product’s real outline without a bright ring of old background pixels surrounding the glaze.
Do not let a smooth advertising cutout take precedence over reality. A slight natural irregularity in handmade ceramic can be a genuine feature. If the mask makes the rim unnaturally straight, compare it with the photograph and restore the true edge. The goal is an honest isolation, not a synthetic redesign of the pottery.
Watch for more than one prominent subject
Adobe notes that Select Subject tends to find the largest or most central object and points users to the Object Selection tool when more precise targeting is required. A table prop, a person’s hand, or another pot in the frame could be selected in error. Confirm the subject before continuing and crop or manually select only when consistent with the original scene.
Consider whether the image is being used in a truthful product listing or a decorative concept page. Removing the background is generally an edit of context, but altering the lantern’s handle, glaze cracks or maker mark can misrepresent the merchandise. Preserve those defining details and maintain the original file in the shop’s product archive.
Export the cutout with an honest review checklist

For a transparent product image, inspect the exported file itself in the intended format and destination. Not every export choice preserves transparency or color behavior. Check the lantern at small catalog-card size, at the detail-view zoom level, and on actual mobile and desktop backgrounds used by the storefront.
The final approval should compare the original photograph, the editable masked file, and the export. Require the rim, handle loop, inner opening, attachments, surface texture, and any maker markings to agree. Select Subject saves time at the first selection step; it does not independently prove a faithful product representation.
How We Research
For the November 5, 2026 editorial review, we consulted these named primary sources: Adobe: Select subjects in images, Adobe: Select backgrounds in images. We compared the published feature description, supported entry points, permission boundaries, and stated limitations with the hypothetical use case above. We did not access a subscriber account, run the described service against real customer or archive data, measure accuracy, or reproduce any product interface. All artwork is an original instructional illustration, not a product screenshot or test result. Feature availability, plan eligibility, security settings, and UI labels may change; recheck the official help pages and local policy before deploying this workflow.
Frequently Asked Questions
No. Adobe notes that the quick action usually prioritizes the most prominent subject. Multiple objects can require more precise selection or manual intervention.
Inspect the handle opening at high zoom and refine an editable mask so the center remains transparent while both outer arcs and attachment points stay intact.
A layer mask is usually preferable for this workflow because it keeps original pixels and allows later adjustment without rebuilding the selection.
Different backgrounds expose pale halos, dark fringe pixels and gaps along the rim that can be hidden when the replacement background matches the original.
Not by itself. Compare the mask and export with the untouched source and reference photographs before making claims about a real product.