
An antiques shop makes an attractive online hero image of a small brass desk bell. The AI-staged version has better lighting, but the engraved workshop badge changes from “8B-12” in the source photograph to “8B-17.” The bell may look more polished, yet that tiny alteration creates a false catalog detail. Replacing the entire image would waste time; ignoring the error would be worse.
Photoroom offers Product Fixer for correcting inaccurate details in AI-generated images using genuine reference photos. This walkthrough uses an invented brass bell and illustrative plate markings. It is not a real Photoroom edit, nor evidence that the system reproduced any particular badge perfectly. The editorial standard is to inspect the resulting pixels against the actual item.
Preserve the source photo as the factual record
Keep an untouched image showing the badge, bell outline, handle attachment, and surface wear. If possible, take one close-up perpendicular to the engraving and another wider product view in even light. Both should be photographs of the same item. A stylized listing image is useful for presentation, but it cannot be the authoritative reference for what was physically engraved.
Record which photograph identifies the item and who owns the rights to use it. If the shop catalog lists a serial or maker number, compare that database entry to the object itself rather than trusting either an AI image or an old spreadsheet automatically. A correction tool can copy visual detail; it cannot independently authenticate provenance.
Check Product Fixer availability and the correct entry point
According to Photoroom’s help center, standalone Product Fixer runs in the web app and supports images, not video. Its dedicated workflow asks for the inaccurate AI-generated image and at least one genuine product reference photo. The help article currently lists paid subscription access and says Product Fixer does not use AI credits; plan eligibility can change.
Distinguish standalone Product Fixer from the related “Fix product” action inside certain generation workflows. In a Shopify-oriented editor the control may appear on a selected image tile rather than the general AI sidebar. Use the entry point appropriate to the file you are fixing; do not assume a mobile screen has the same standalone tool.
Identify the smallest region that needs correction
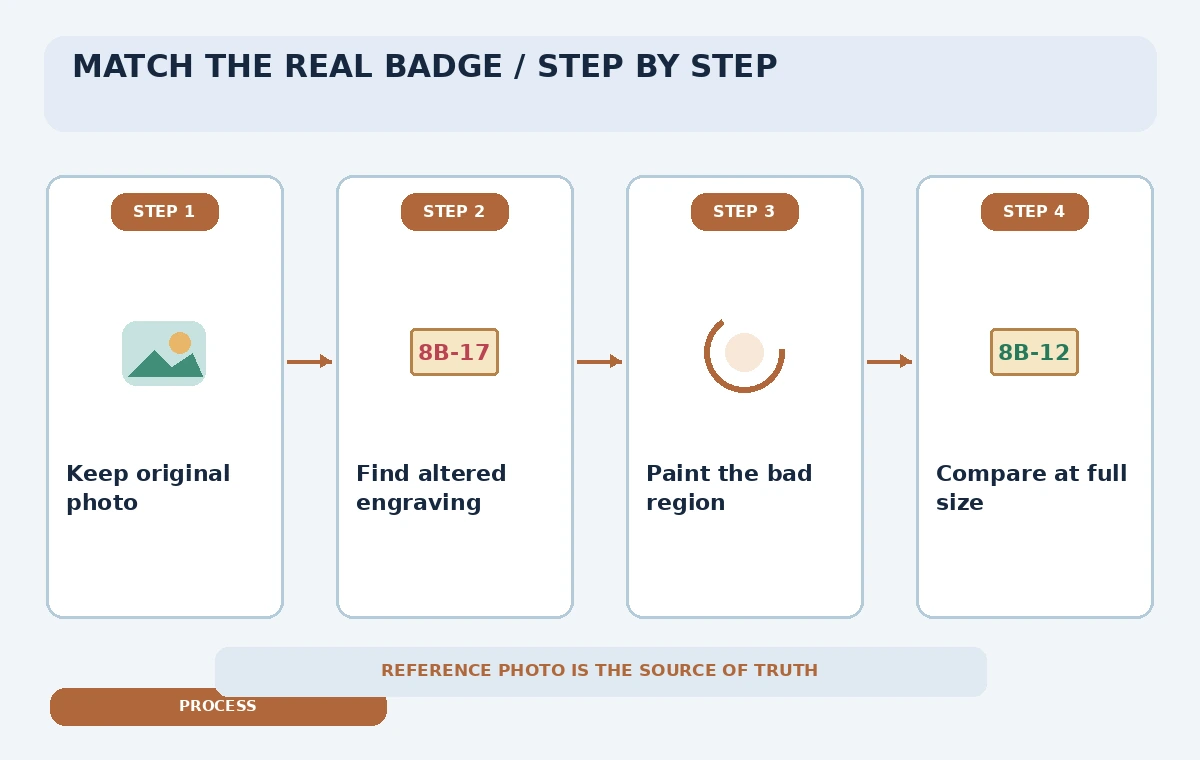
Zoom into the hero image before drawing a selection. Note the exact mismatch: the last digit on the badge, letter shape, border thickness, or rivet position. If the item’s silhouette and brass color are already correct, do not ask the model to regenerate the entire bell. Narrow edits minimize the surrounding material that could be accidentally rewritten.
Photoroom documents a brush, pan and zoom controls, and a prompt field after the region is marked. Make the brush large enough to include the broken character and its immediate border but small enough to avoid adjacent stamps or highlights. A request such as “match the engraved plate in reference photo; retain the original background” is narrower than “improve the product.”
Supply a readable reference rather than a guess
Upload a clear photo of the badge showing the verified marking “8B-12” in the fictional example. Additional angles can be useful when glare obscures a letter, but only if they show the same physical product. A cleaned-up image from another model is not a reliable reference because it may repeat the exact error you are trying to correct.
If the engraving is too faint to read in any source photograph, stop and inspect the object directly. Do not invent the missing character based on symmetry or what looks plausible. The correction should follow established evidence, and the product description should say “unreadable” when the original item itself cannot support a precise transcription.
Compare the false badge with the corrected candidate
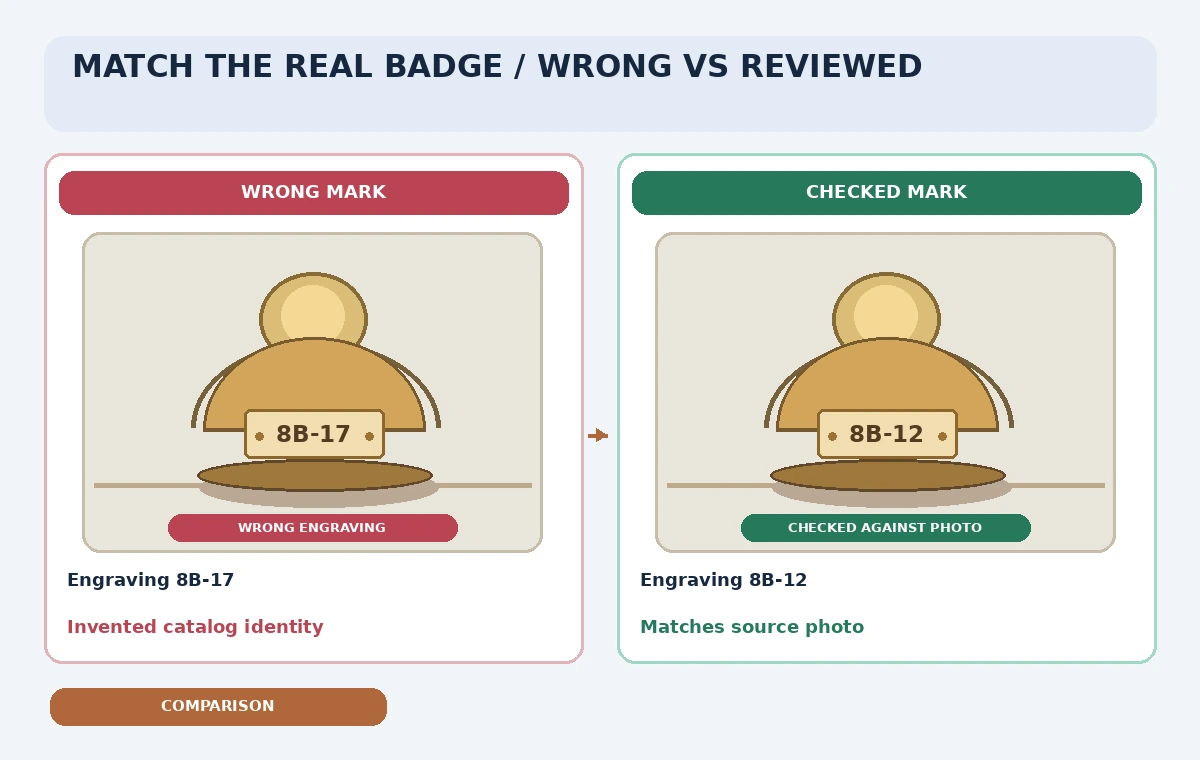
The comparison drawing shows a wrong plate reading “8B-17” and a checked candidate reading “8B-12.” These are illustrative graphics, not generated outputs from the tool. In real work, place the source and edited crops at the same magnification and compare letter count, spacing, stroke shape, screw placement, and the adjacent patina.
Inspect the area just outside the brush mask. AI repairs may create a clean-looking character while warping nearby metal texture or adding an implausible rivet. If the repaired badge looks sharper than everything else, consider reducing the edit scope or using a factual original crop instead. A convincing visual result is not proof of an accurate object.
Check the entire listing, not only the engraving
After the local repair, review the entire hero image for handle count, bell curvature, contact shadow, reflections, and extra ornament. AI-generated catalog pictures can change these details even when the selected engraving is corrected. Compare against the reference product photo rather than against other AI-generated variations that may share errors.
The shop may also display a stock number, price, and condition statement in adjacent website fields. Those values should come from its inventory system, not be inferred by image recognition. Keep the product identifier separate from marketing copy so a changed picture does not silently rewrite the listing database.
Export with a transparent audit trail
Use the tool’s documented download or “Use this image” route after a satisfactory preview. Save both the unmodified photograph and the final derivative under distinct names, along with a short note about the corrected badge. Use ordinary product-friendly filenames rather than embedding internal workflow labels in the public-facing picture.
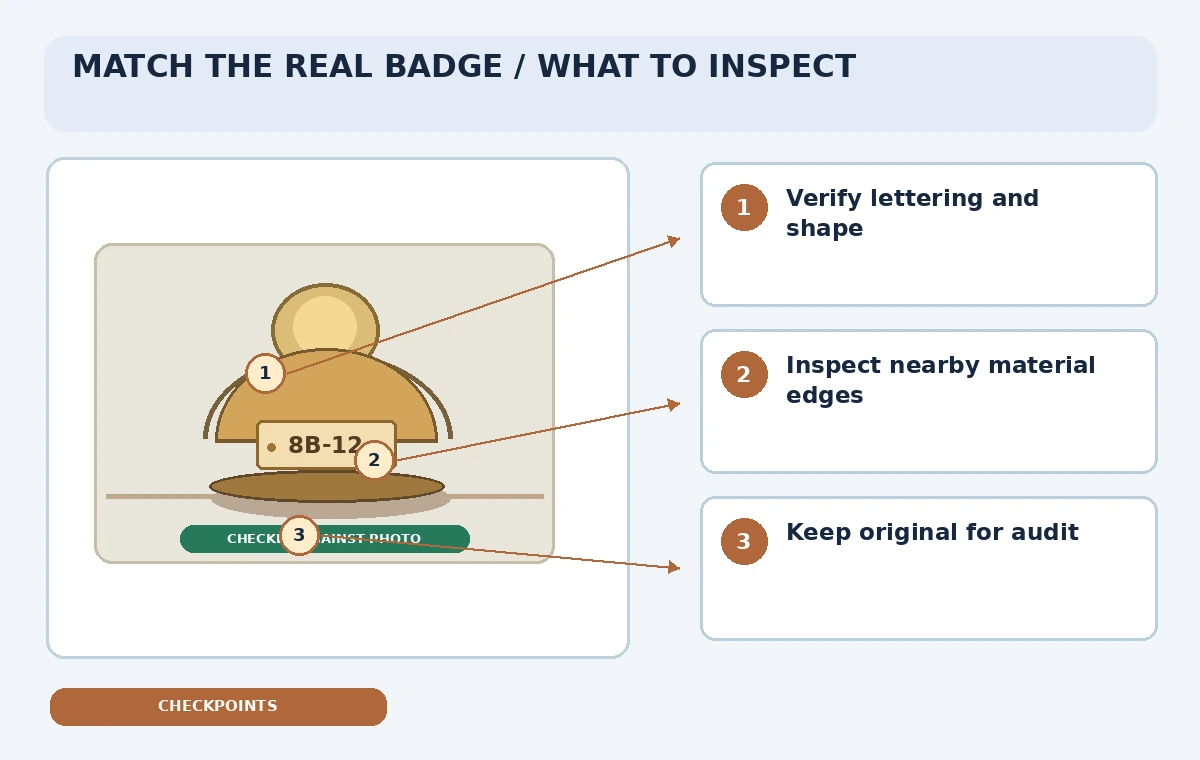
If the image was staged or substantially synthesized, describe it appropriately in the publishing workflow instead of presenting it as untouched documentary photography. Buyers should not be led to believe that generated backgrounds or repaired engravings are independent proof of origin. The inspection diagram highlights the original plate, edge integrity, and saved provenance.
When to abandon the AI repair
If several attempts cannot reproduce the exact characters, replace the hero with the genuine photograph or manually prepare a conventional crop under the shop’s image policy. A product with a delicate authenticity mark is not a good candidate for repeated free-form visual invention. The cost of a mislabeled object may exceed the benefit of a polished background.
Check the current Photoroom help center before using Product Fixer on a new platform or plan. Tool names and available editor routes can change. Success means the buyer sees an appealing but faithful representation, and a staff member can explain which source photo supports every catalog claim.
How We Research
For this November 5, 2026 documentation review, we consulted the following named official references: Photoroom: How to Use Product Fixer; Photoroom: Improve Image Fidelity with Product Fixer; Photoroom: Product Fixer in Product Editor. We compared currently documented capabilities and access limits with the safeguards required by a narrow fictional work scenario. We did not use a paid account, run the API, inspect live code, process a real inventory, repair a product photo, or generate footage. Every illustration is an original conceptual drawing rather than a vendor screenshot or measured output. Features, plan eligibility, generative credit terms, policies, and interface labels may change; recheck the vendor sources and obtain human approval before applying the workflow to real records.
Frequently Asked Questions
Yes. Photoroom documents accepting exported AI images from other services along with genuine product reference photos.
No. The official help center describes it as an image-only feature.
The current Photoroom documentation says Product Fixer does not use AI credits; paid plan eligibility still applies.
No. Compare it visually with a real reference and verify any catalog code independently.
No. The badge and examples are fictional instructional drawings.