
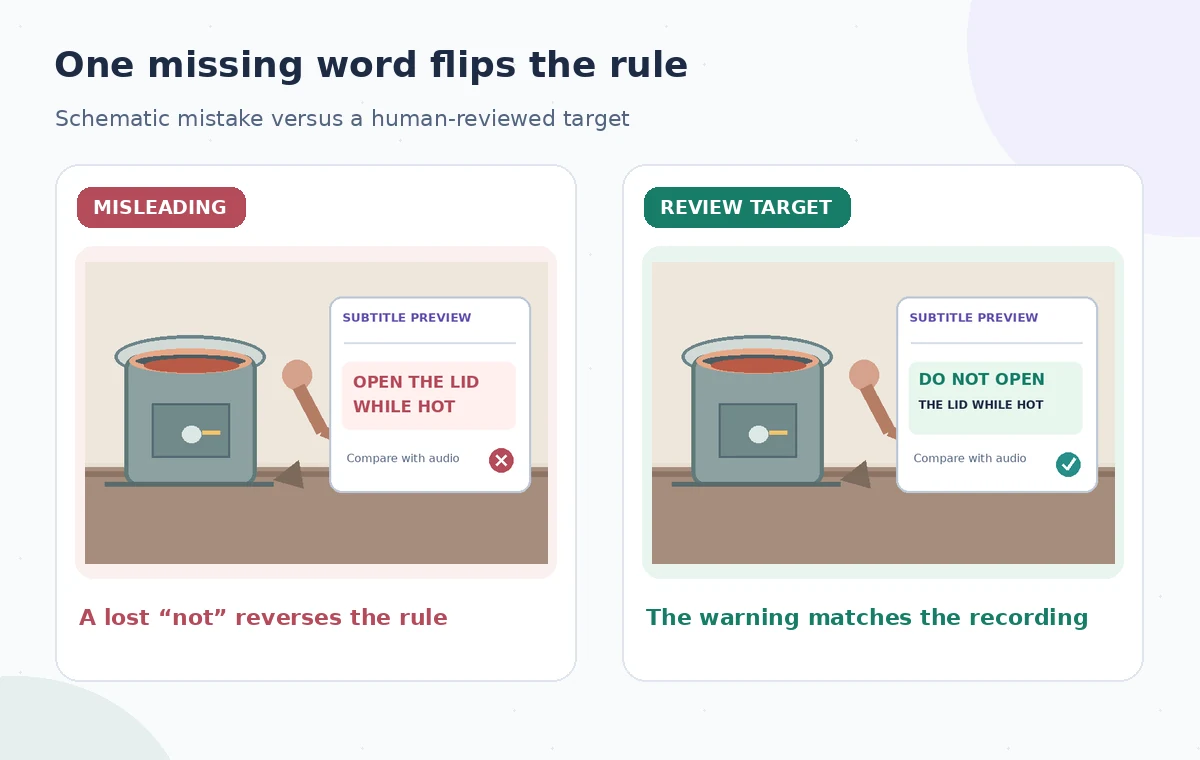
A kiln demonstration can turn into dangerous advice if a subtitle quietly drops one short word. Imagine a ceramics educator saying, ‘Do not open the lid while it is hot,’ while an automatic title reads, ‘Open the lid while it is hot.’ The problem is not a cosmetic typo; it reverses an instruction. Final Cut Pro’s Generate Captions can speed up subtitle creation, but a transcript remains a draft until a person checks what was actually said. This guide uses a hypothetical training clip and focuses on the accuracy and readability of a safety-critical sentence, not on a claimed real-world processing test.
Understand what Generate Captions makes
Apple’s current Final Cut Pro guide describes Generate Captions as a tool that detects spoken audio and produces editable subtitle title clips. In the timeline, choose clips with speech, then use Edit > Generate Captions > Subtitles, the clip context menu, or the Enhancements menu. The generated subtitle clips are connected to their source clips and timed around the spoken words. You can open the Title inspector and edit the text just as you would another title. That flexibility is useful for design, but it also means these subtitle titles should not be confused with a validated accessibility transcript.
Apple specifies that this feature needs a Mac with Apple silicon and currently supports U.S. English. The first use may download the language model. A video in another language, a mixed-language interview, or a machine that lacks the required hardware needs a different workflow, such as human transcription and manual subtitle entry. Also distinguish a styled subtitle title from a separately managed closed-caption track. If the delivery platform requires selectable caption files, confirm the format and export path before investing time in title styling.
Prepare a safety reference before generating
Write down the exact spoken warning from the approved script and the recorded audio before asking the model to transcribe it. For the imagined kiln clip, the reference is ‘Do not open the lid while it is hot.’ Mark the start and end of that phrase and make a second note of any temperature, protective equipment, or timing statement that affects viewer safety. Do not use an AI-produced transcript as its own reference; that would hide the same recognition error in both the draft and the audit.
Keep an unchanged audio/video master and work in a duplicate project or protected library snapshot. Listen for breathing, machine noise, and the places where a presenter lowers their voice. These are exactly the sounds that can cause a short syllable or negative contraction to disappear. If the microphone did not capture a word intelligibly, do not guess what the instructor intended. Confirm with the speaker or production notes, or record a correction. A title cannot make an ambiguous instruction safe.

Generate subtitles and locate the vulnerable phrase
With the prepared clip in the Final Cut Pro timeline, select only the region that contains the lesson and run Generate Captions > Subtitles. Apple also documents the Shift-Command-S shortcut. Review the resulting subtitle title clips in the timeline; the app connects them to the selected source clips. Locate the section around the kiln lid warning and compare every displayed word against the original audio. Check the action verb, the negative, the object, and the condition: ‘open,’ ‘not,’ ‘lid,’ and ‘while hot’ all carry distinct meaning.
Proofread contractions separately. ‘Don’t’ and ‘do’ may look similar at a glance, and a sound masked by a fan can be easy to misrecognize. Add punctuation only where it clarifies the original statement, rather than rewriting the instructor’s meaning. When the automatic title is wrong, edit the title text manually and then play the passage again in context. The process diagram contrasts source audio, an editable title pass, and an approved warning; none of those illustrations represents an actual Final Cut Pro screenshot.
Use the AI tool selection checklist
Check segmentation and timing, not just spelling
A correct word presented too late can still confuse a learner. Play from several seconds before the warning through several seconds after it. Make sure ‘Do not’ appears with ‘open the lid’ rather than being stranded on a prior subtitle that disappears first. If the sentence is broken into two title clips, avoid a split that temporarily places an unsafe command on screen. Evaluate rapid cuts, pauses, and any change of speaker. The objective is readable, synchronized meaning, not the largest possible number of subtitles per minute.
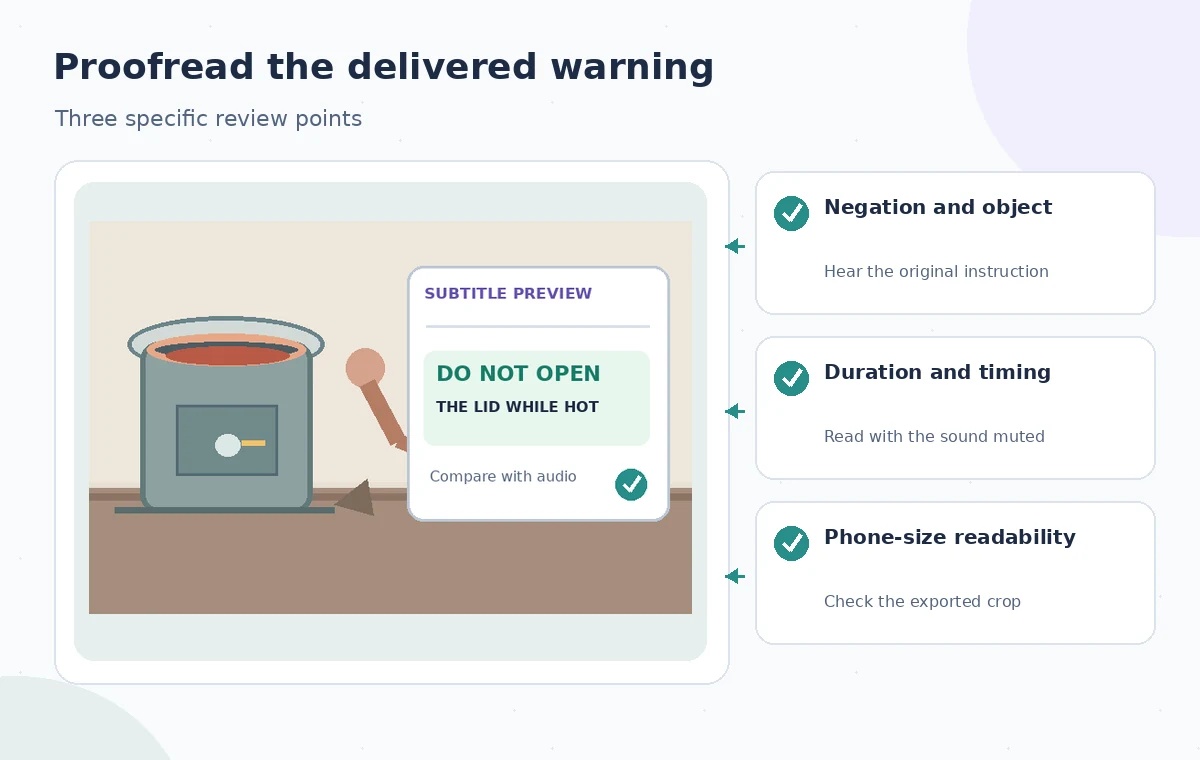
Review timing with sound on and with sound muted. A reader should never have to infer the missing negative from a later line. Leave enough display time for a normal reading pace, while avoiding titles that linger onto unrelated steps. Listen to the export rather than relying exclusively on the editing monitor: the delivered render may have different timing or framing. If audio was rearranged after titles were generated, recheck every caption in the affected range.
Customize subtitles without obstructing the demonstration
Apple documents subtitle-specific controls in the Title inspector, including animation modes and a Vertical Social Media Safe option for 9:16 work. Start with a plain, high-contrast style for an instructional clip. A fast per-character reveal can make the negative appear after the command, so favor a presentation that shows the complete warning promptly. Test multiple line lengths at the actual delivery size, especially when a presenter points to the kiln or a heat indicator near the bottom of the frame.
Keep hands, controls, and hazard indicators unobscured. If the tutorial will appear on several platforms, preview a desktop landscape version and a phone-size vertical crop separately. The ‘safe’ zone in one platform’s editor is not a guarantee of perfect placement in every app overlay. The example illustrations show how a visually attractive subtitle can still mask the kiln latch. Place meaning and practical legibility ahead of animated style; extra visual polish has no value if the safety message is late or hidden.
Plan a safer multi-tool workflow
Run a word-by-word release check
Use a short review sheet with four columns: recorded wording, visible wording, entry/exit timing, and action taken. Mark every negative, number, technical noun, and conditional phrase. Ask a reviewer who has not seen the transcript to watch the lesson at normal speed, then again without sound. Have them explain the safety rule in their own words. If their interpretation differs from the original recording, fix the titles or the script rather than treating the disagreement as merely subjective.
Check the beginning, middle, and end of the finished export, not only a timeline preview. Confirm that the generated subtitles are actually visible in the final version and not covered by platform UI, burned into the wrong crop, or omitted from a separate caption delivery. If a platform requires closed captions, use the appropriate closed-caption workflow instead of assuming styled title clips satisfy that requirement. The final inspection diagram calls out the negative, subtitle duration, and crop clearance.
Know when to stop automatic transcription
If speakers overlap, the warning is whispered behind ventilation noise, or the audio is not in supported English, manual transcription may be more reliable than repeated machine passes. The same applies when a demonstration contains formulae, dial values, or specialized ceramic terminology that the speech model cannot consistently recognize. Resolve each factual phrase from the audio and authoritative lesson plan. Never insert a safety instruction that the presenter did not say simply because it would sound more sensible.
Generate Captions is a productivity tool, not a substitute for a safety review or an accessibility assessment. The scenario here is fictional and the graphics are original conceptual diagrams; we did not record a kiln, operate Final Cut Pro on this clip, or measure speech-recognition accuracy. Apple documentation supports the menu path and interface capabilities, while the insistence on source comparison is an editorial safeguard. Preserve the approved transcript alongside the video so future cuts can be checked against it.
How We Research
We checked the named vendor documentation: Apple: Generate subtitles automatically in Final Cut Pro and Apple: Create closed captions in Final Cut Pro and Apple: Final Cut Pro release notes. We compared its stated user controls, availability warnings, workflow stages and limitations against the concrete scenario described here. We then developed original educational diagrams and a separate human-review procedure for the materials that need independent evidence. The scenario is hypothetical: we did not sign into a paid account, upload a real customer asset, operate the feature on the example, or measure output quality. The figures are schematic, not actual interface captures or recorded processing results. Product menus, permissions and plans can change; verify the current installed edition and applicable policies before relying on this method.
Frequently Asked Questions
Generate Captions > Subtitles creates editable subtitle title clips; closed captions use a dedicated caption workflow and may support caption-specific delivery formats. Verify what your publisher requires.
Apple currently specifies a Mac with Apple silicon for Generate Captions; check the installed version and system requirements before planning a production workflow.
Apple currently lists U.S. English for this feature. For other languages, prepare and verify a separate transcript or localization workflow.
Check negations, numbers, objects, conditions, and speaker intent against the recording. A single missing “not” can reverse the instruction.
No. Preview the final file and the target platform presentation; confirm the chosen output contains the required subtitles or closed-caption assets.