
A community media team recorded a short sign-language introduction beside a bright studio window. The scene looks attractive, but the person signing is underexposed and their hands cross a dark shirt. CapCut offers an AI Relight tool for changing video illumination. This hypothetical walkthrough is not an accessibility certification or a report of a tested clip: it explains how to try the feature while protecting the movements and facial expressions that carry the message.
Set an accessibility goal before editing
Decide what must be visible in the final video. For this recording, hands must separate from the clothing and background, facial expressions must remain discernible, and the signer’s movements must stay in their original order. Relighting should improve visibility rather than redesign the performance. Save the untouched camera master and obtain the performer’s approval for the intended edit and distribution. A visual effect cannot repair a gesture cropped out by the camera or a missing part of the original recording.
Review several unedited moments: a hand held near the face, both hands passing across the torso, and a fast transition between signs. Note the window’s brightness and whether the camera changed its exposure mid-shot. Choose a quality goal that can be judged side by side, not a claim such as fully accessible. The signer’s own review, accurate captions where relevant, and the production’s accessibility requirements remain separate checks.
Find CapCut AI Relight and identify its controls
CapCut’s official Relight guide describes importing a clip into a project, selecting the clip, and looking under the right-side Basic editing controls for Relight. It describes facial, ambient, and creative lighting choices. The product page also names adjustments such as intensity, light color, radius, and direction. Interface labels and which choices appear may differ by installation, region, or account. Verify the controls in your edition before following a menu path borrowed from a tutorial.
Begin with the least conspicuous setting that improves hand and facial separation. A dramatic side light may look cinematic while making one palm disappear against the clothing. Avoid assuming the tool automatically recognizes sign-language meaning; the documentation presents a video-lighting feature, not a semantic interpreter or an accessibility validator. If the original exposure leaves no usable detail, consider another take instead of asking AI to invent what the camera never captured.
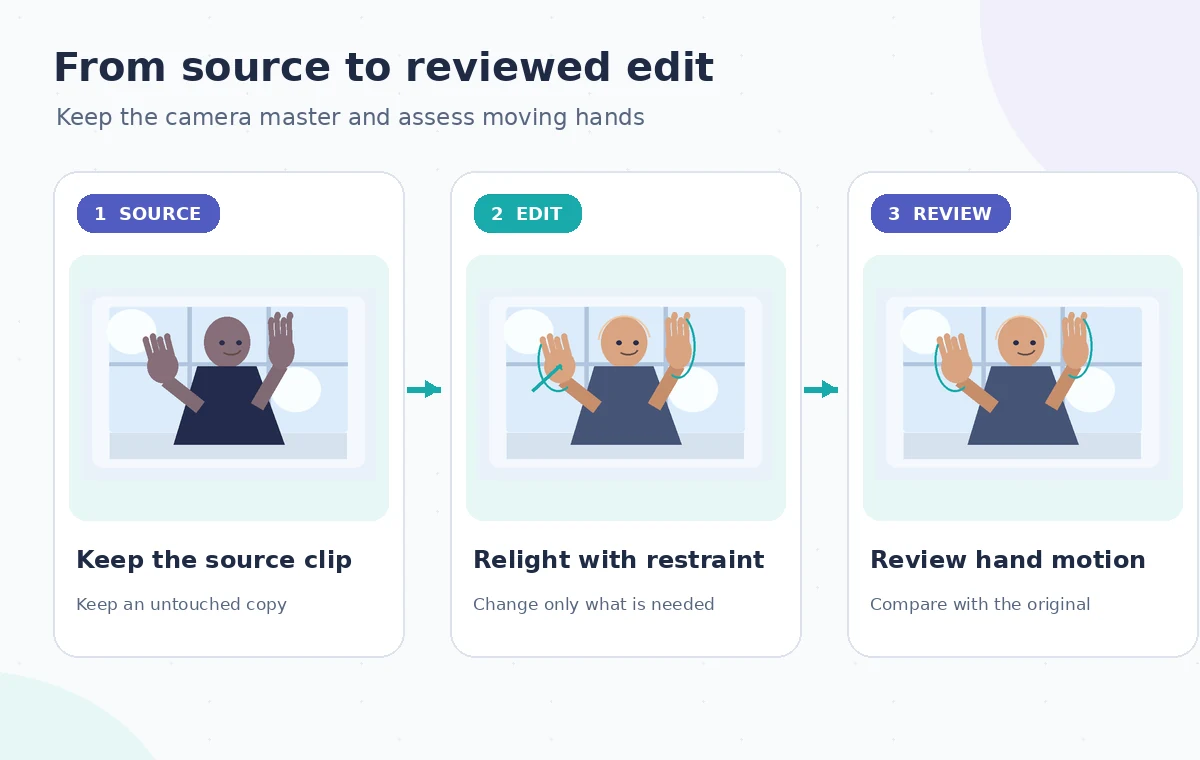
Choose a conservative lighting direction
Place the editable clip on the timeline, preserve a duplicate for comparison, and enable Relight on the working version. For a strong rear window, a gentle front or ambient lift is usually a more relevant experiment than a colorful creative preset. Adjust gradually and compare matching source and edited frames at the same timestamp. Look at the knuckles, open palm, sleeve boundaries, cheek, and eyebrows. These shapes communicate visually; overprocessing can flatten them into one bright region.
Keep a neutral reference nearby, such as another frame shot under more even light, but do not force all skin colors to match a single automated target. Different surfaces should retain differences in brightness and hue. The goal is useful contrast, not a universal skin-tone setting. Review the window and walls too: large halos or shifting backlight can distract from the signer’s movements. Keep detailed effects settings recorded so another editor can reproduce or reverse the adjustment.
Use the AI tool selection checklist
Inspect motion rather than approving one attractive still
Play the sequence at normal speed, then move frame by frame through quick hand crossings. A result can appear clean in a single frame but shimmer as the signer turns or moves into a new part of the virtual light. Watch for fingers that blend together, false halos around moving hands, crushed shadows on dark fabric, and expression changes caused by fluctuating contrast. Check transitions to adjoining footage, because a sudden color shift can look like a jump in the performance.
Check the same short range with Relight disabled. If a finger contour or brow line only appears in the processed picture as a strange new edge, do not regard that as verified source detail. Light and texture enhancement are estimates. You can reduce strength or choose a simpler grade if the effect becomes distracting. Do not remove pauses or speed up signing merely to make the clip feel more concise; timing and facial grammar are part of the communicated content.
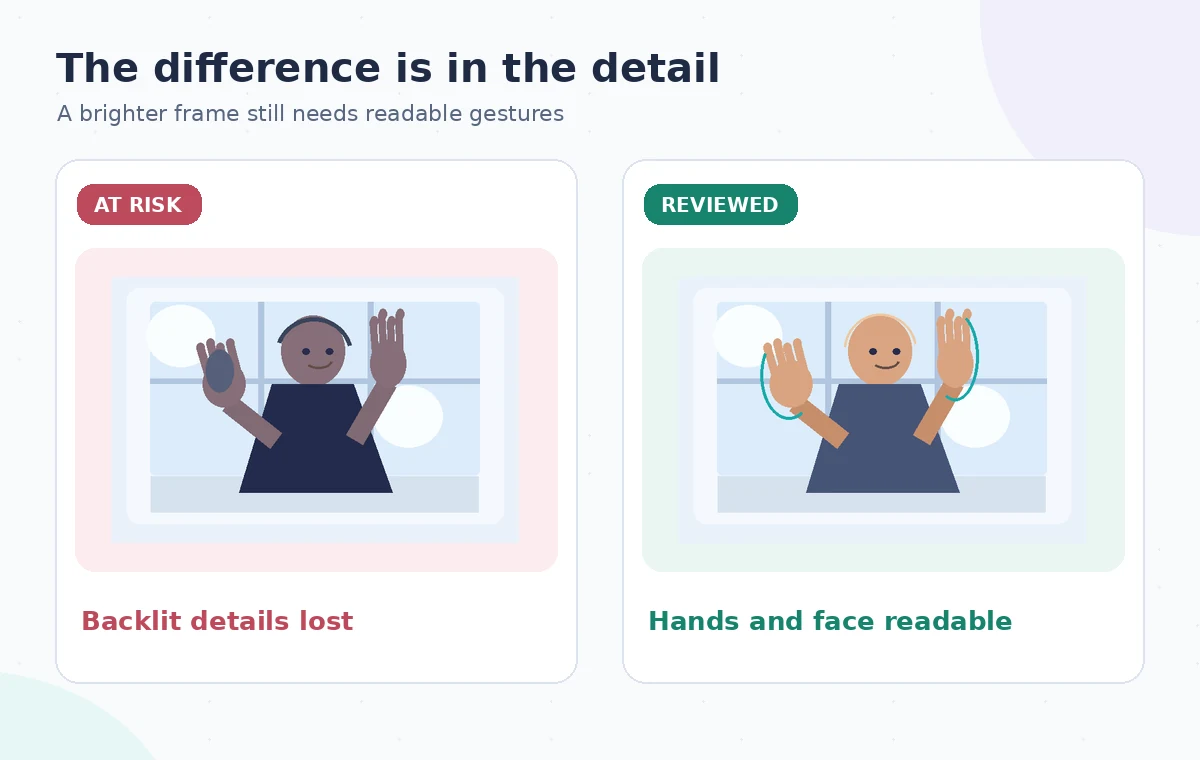
Protect color and subtitles during the finishing pass
Review skin tones against the source footage and the production’s style guide. Excessive warm or cool relighting can shift color meaning or visually separate the hands from the face in an unnatural way. If captions are part of the video, make sure they do not cover a moving hand at the lower edge of the frame. A title bar or social-media crop can hide important content even after the light problem is solved. Check the exact aspect ratio for each destination.
Provide an uncluttered viewing area and avoid flickering contrast effects that compete for attention. Captions, transcripts, and interpreter credit may be required by the project’s own standards, but CapCut’s Relight tool does not generate or validate them in this workflow. Have a qualified reviewer examine the actual signing if semantic accuracy matters. The editor should not infer that brighter frames automatically preserve the message.
Plan a safer multi-tool workflow
Export and test the file independently
CapCut’s guide lists export choices including frame rate, codec, bit rate, and quality. Keep settings appropriate to the source and avoid unnecessary conversion that makes finger motion harder to follow. Export a short segment for review before completing a longer lesson. Open the actual exported file, rather than the editor preview, and check details during hand movement and against a contrasting background. Compression artifacts can merge fingers or add block edges around motion.
Test on the real playback size, including a phone if the video is intended for mobile. Inspect the start and end of each edited segment for sudden lighting shifts. Preserve the original master, the editable project, and a clear note of the Relight settings. No measured brightness improvement is claimed here: the examples and diagrams are teaching illustrations, and the success criterion is the reviewer’s comparison against the source.

Know when relighting is the wrong solution
Reshoot if the signer is mostly a silhouette, fingers are hidden outside the frame, or the window causes severe clipped highlights that spread into the subject. A small fill lamp or a different camera angle may produce more reliable footage than complicated AI reconstruction. If the topic contains safety guidance or legal instructions, require a content reviewer to check the final clip as well as a person competent to evaluate the signing. Keep different approvals explicit.
When documenting the decision, distinguish lighting adjustments from changes to the signer, speech, or wording. If an AI operation made substantial visual changes, describe that in the production notes. The best result may be only a modest lift of the face and hands, not the most dramatic before-and-after image. The final goal is a trustworthy educational recording whose meaning and performer remain intact.
How We Research
We checked the named vendor documentation: CapCut: Instantly Relight Videos with AI. We compared its stated user controls, availability warnings, workflow stages and limitations against the concrete scenario described here. We then developed original educational diagrams and a separate human-review procedure for the materials that need independent evidence. The scenario is hypothetical: we did not sign into a paid account, upload a real customer asset, operate the feature on the example, or measure output quality. The figures are schematic, not actual interface captures or recorded processing results. Product menus, permissions and plans can change; verify the current installed edition and applicable policies before relying on this method.
Frequently Asked Questions
No. It changes the appearance of video lighting; it does not validate the meaning of signs or guarantee accessibility.
CapCut describes a Relight control under the Basic editing panel for selected footage; confirm the menu in your installed version.
Hand and facial contours can remain too dark or become distorted by aggressive lighting, especially during fast movement.
No. Review at normal speed and frame by frame, then inspect the actual exported file for flicker and compression.
Use a better camera angle or reshoot. AI lighting cannot reliably restore visual information absent from the source.