An impressive AI game concept painting is not automatically a usable level background. Playable scenes require layers, transparent edges, consistent perspective, and enough empty space for characters or interface elements. This tutorial starts with a fictional side-scrolling forest scene and shows how to convert a concept into a structured asset pack for Unity. The workflow is a planning and quality-control guide based on software documentation, not a claim that we created, imported, or benchmarked a finished game.
Specify what the player must see and where they move
Define the target engine, viewport, camera movement, level direction, and expected foreground overlap before generating art. For a hypothetical forest platformer, the player moves left to right; the horizon should remain above the playable floor, and the path cannot disappear behind a decorative tree. Write a short art brief: soft pastel forest, one distant ridge, two tree-depth layers, a clear path, and no embedded interface labels. A concept image may help establish mood, but it must be checked against a gray-box level where player dimensions, jump height, and collision boundaries are already known. A background should never become the source of truth for where a platform or hazard exists. Use gameplay geometry and art composition as separate layers of the production process.
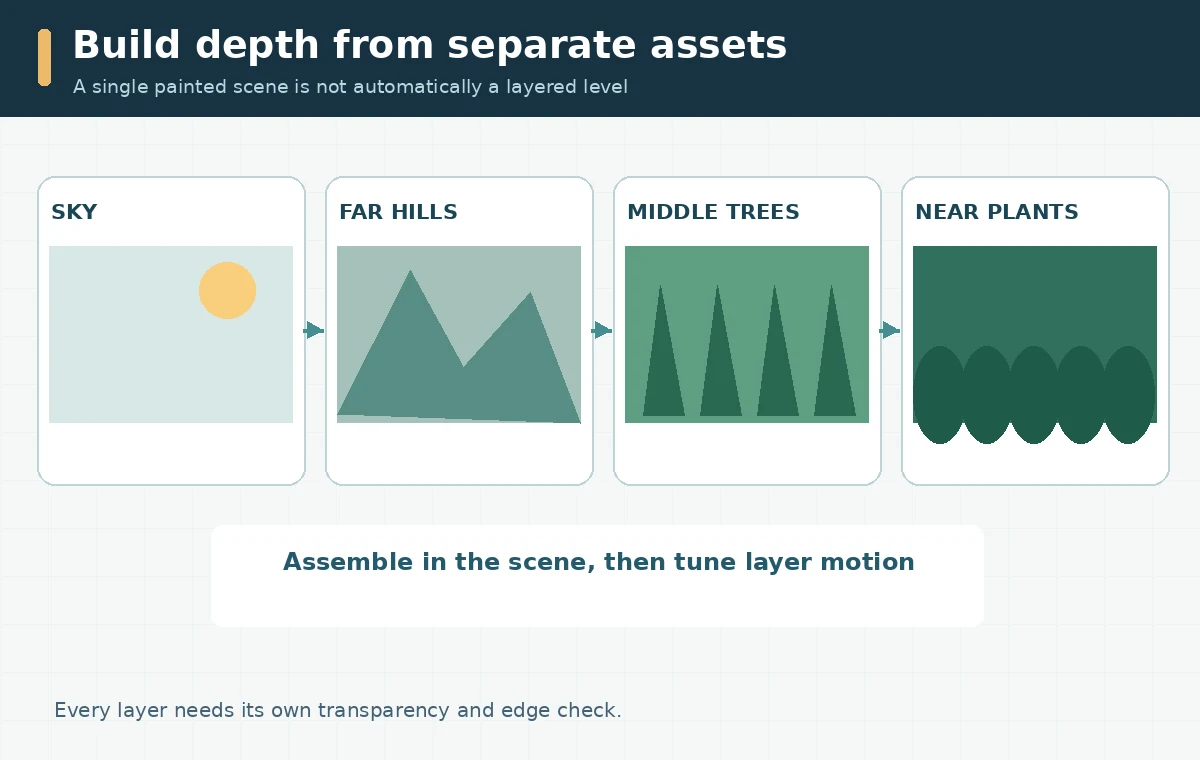
Plan four depth layers before choosing a model
Break the scene into distant sky, far hills, middle trees, and near plants. Each needs its own export file with transparent areas where appropriate, plus a consistent horizon and color palette. Far layers should have less contrast so the player and interactable objects remain legible. Do not assume an AI generator will output four clean transparent layers just because a prompt says “parallax.” Generate a concept, then isolate or redraw its major elements into separate assets. Where a tree should overlap a character, define that rule in the level specification rather than relying on the generated image. Preserve sufficient texture beyond the screen edges if the camera moves. Mark the intended scroll behavior for each layer as a design decision; do not attach invented performance gains.
Give composition references a job, not blind authority
A reference layout can show where the ground, horizon, and canopy belong. Adobe Firefly documents an image composition reference that guides outline and depth, while its text-to-image options depend on the selected model. That can help create a consistent concept sheet, but the result still needs manual extraction. A reference should not show another game’s distinctive art unless you have the required rights. Create an original grayscale plan of your level geometry and ask the concept to follow it; keep structural review separate from aesthetic changes. If the path is blocked by the generated foliage, revise the reference or repaint that zone. Do not advertise the output as a direct copy of the gameplay collision mesh. Game design and generative illustration solve different parts of the problem.
Export layers with transparency and enough edge coverage
Save separate transparent foreground and midground assets where objects should overlap other scenery. Check halo edges by placing each layer on both dark and light test backgrounds. A soft foliage mask that looks fine over green may show white fringes against a blue sky. Prevent repeating patterns from ending abruptly when the camera pans: extend or design seam-safe edges as appropriate to the actual implementation. Keep exact exported pixel dimensions and a simple coordinate origin reference in your asset notes, and do not accidentally change the scale between layers. Use predictable asset naming inside the game project and a non-destructive layered master file. This is a production handoff, not a recommendation to flatten every element into one oversized bitmap.
Check sorting and sprite import inside Unity
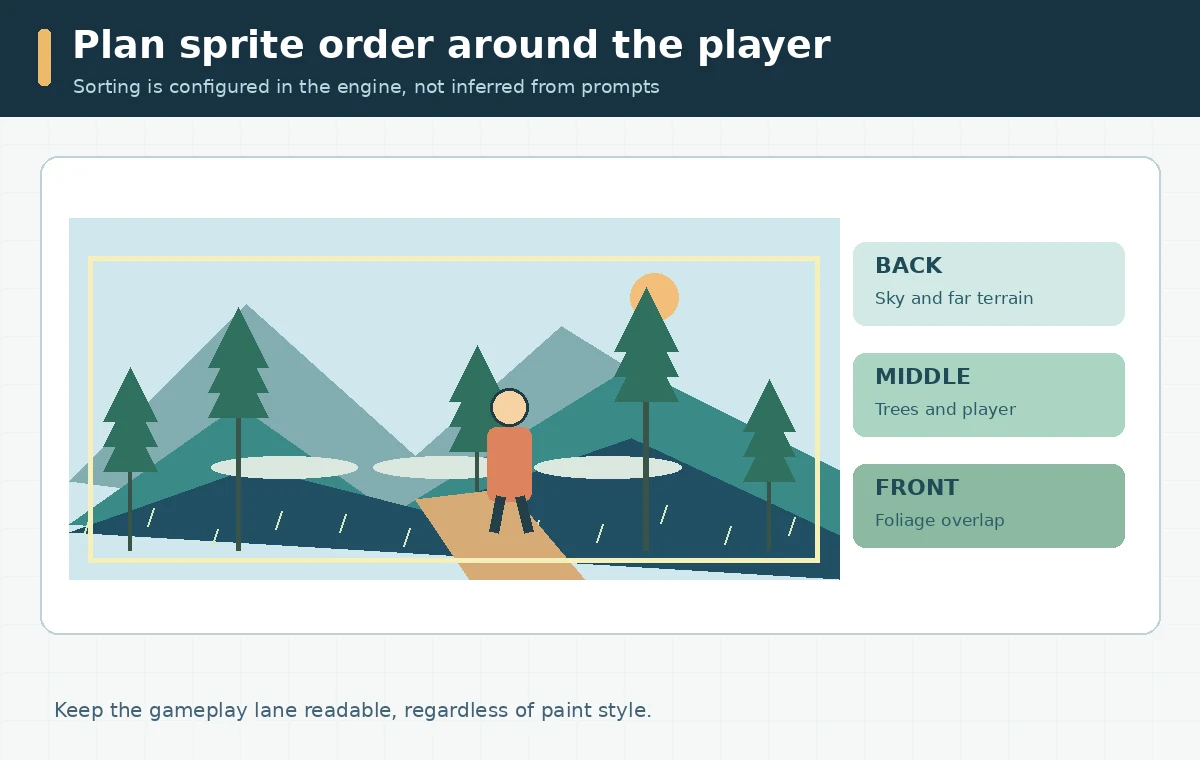
Unity’s 2D manual describes importing sprites, rendering them through Sprite Renderer, and controlling their order with Sorting Layers and other sorting methods. For the forest example, the far hills render behind middle trees, which render behind near plants, while the player occupies an intentionally chosen position. A correct sorting order matters more than the source prompt. Review transparency and sprite settings in the engine itself, not just in a design app. For repeating elements, consider a tile-oriented or sprite-atlas approach only when it suits the game’s performance and visual needs; Unity also documents these features. Do not invent the correct pixels-per-unit or texture-compression settings without knowing the actual project configuration.
Test readability in motion, not only in a still screenshot
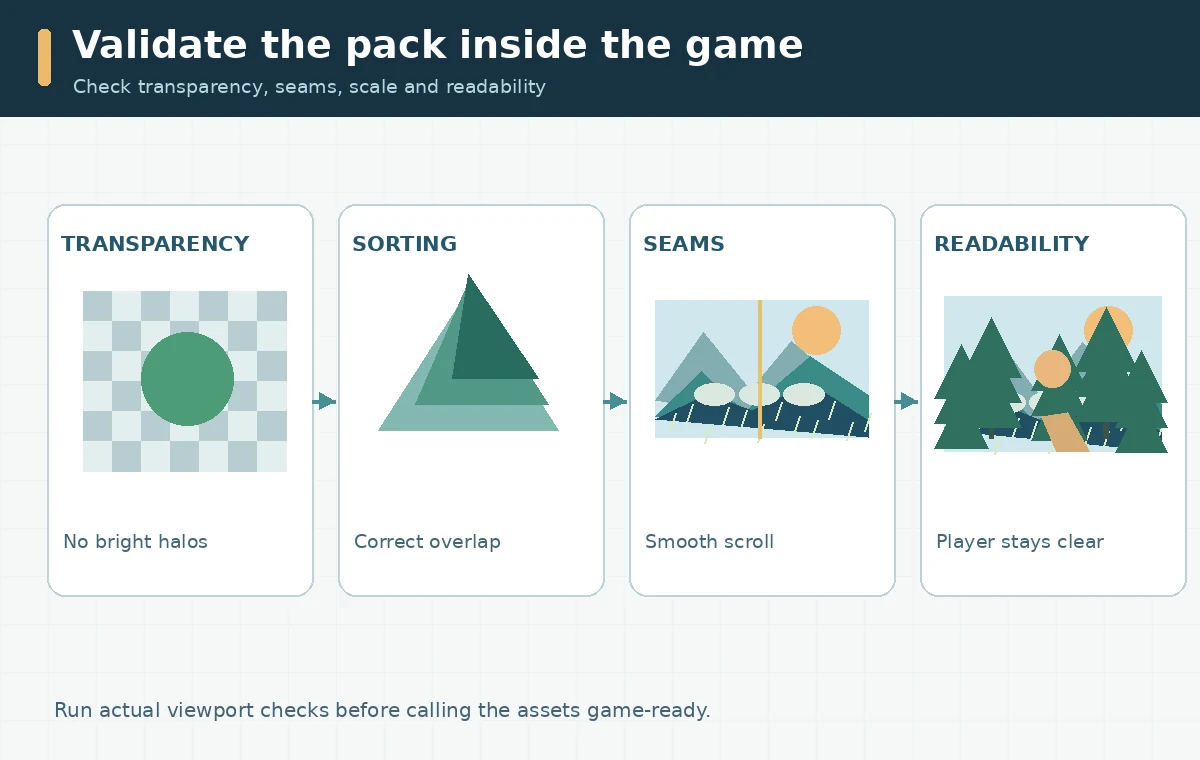
A background can look coherent in a still frame but become confusing during camera movement. Run a basic viewport review: can the player remain visible against bright leaves, do nearby objects communicate depth, and do repeated hills reveal their seams? Check camera positions near the beginning, middle, and end of the level. Screen a low-contrast and a high-contrast display mode if the game supports them, and verify that critical UI labels sit over suitably quiet areas. A parallax design should add perceived depth without pulling attention from jump timing or hazards. If necessary, reduce saturation in far hills, simplify foreground patterns, or move decorative elements outside the path. Document the visual failures rather than claiming a measured frame-rate benefit from AI.
Prepare a clean art handoff and rights audit
The final delivery contains a concept preview, layered source file, separate exported assets, a layer-order map, viewport screenshots from the actual game if available, and a note on reference permissions. If no Unity prototype has been imported yet, label the pack as untested, not game-ready. Check whether tool terms and source images permit commercial use; do not imitate protected franchise designs or claim originality solely because a model rendered the pixels. A game studio should still review the final files for technical quality, accessibility, consistent style, and provenance before release. The UVU of this guide is the layer and validation plan: it turns “nice AI art” into clearly specified inputs for a human-led 2D production workflow.
How We Research
We cross-checked Unity’s 2D creation and sprite-sorting manual with Adobe Firefly’s composition reference guide and text-to-image model documentation. Sources were reviewed October 28, 2026. No game project or asset integration was tested; Unity settings must be verified in the actual project. We distinguish documented product behavior from illustrative editorial workflows and do not assert personally tested output quality or a feature outside the cited product documentation.
Frequently Asked Questions
Usually it needs separation into individual scene layers and a review of transparency, edges, scaling, and motion behavior.
A practical starter set is sky, distant terrain, midground scenery, and foreground plants, with sorting chosen for your player and camera.
No. The developer must configure sprite renderers and sorting behavior to match the intended scene.
Not reliably. Inspect each export over contrasting backgrounds, repair halos, and confirm dimensions before import.
Check player readability, collision-independent geometry, seams during camera movement, and sprite sorting in the actual viewport.