
An AI background changer is helpful when the person or product in a photograph is right but the surrounding environment is distracting. The hard part is not inventing a pretty scene; it is preserving the subject’s identity, cleanly isolating edges and matching light so the result does not look pasted together. Canva’s BG Generator offers a useful example because it separates a foreground subject from a generated environment and includes relighting choices. This workflow focuses on realistic composites and honest use, not on creating evidence of a place that was never visited.
Decide whether a new backdrop is appropriate
Choose the use case first. A promotional portrait for a fictional campaign can be a clear composite; a newsroom image, real-estate listing or identity document has stricter expectations and may need the original unaltered scene. Confirm the photographer’s permission and the subject’s consent before uploading or manipulating the photo. If the image might be mistaken for attendance at a real event, label it or avoid the substitution.
Write a one-sentence brief such as “place the approved studio portrait against a neutral light-blue office-like gradient for a website team page.” This is easier to verify than “make it stunning.” Specify what must not change: face, clothing, glasses, hair silhouette and body proportions. Avoid directing the AI to redraw a person when only the backdrop needs replacing.
Prepare the subject and check selection edges
A good source photo has enough separation between subject and original background to identify hair edges, shoulders and transparent objects such as eyeglasses. Inspect the original before running an AI tool: heavily compressed images and motion blur can make a convincing cutout impossible. Keep a backup and determine the final aspect ratio so the generated background fits the actual crop rather than forcing an awkward extension later.
Canva’s background-removal documentation describes removing a photo backdrop and refining edges; feature access depends on the current plan. If the subject includes intricate flyaway hair, inspect those edges on both a light and dark temporary background. Do not crop them away without reviewing the impact on the person’s recognizable appearance.

Use BG Generator for the environment, not the identity
The BG Generator help page describes choosing a photo, opening the editing tools, and prompting for a replacement background. Write the scene prompt with location type, color, perspective and lighting direction: “simple studio wall, pale blue-gray, soft light from camera left, faint grounded shadow.” Avoid invented signage, branded office interiors or a specific real landmark unless authorized.
Generate a small set of candidates, then discard those with incorrect perspective or elements that seem attached to the subject. Canva’s background flow may provide relighting options; use them carefully after choosing the scene. Do not call a relit composite a real photograph taken in that room. If you need a documentary image, keep the original background instead of manufacturing a plausible substitute.
Align light direction, color temperature and floor contact
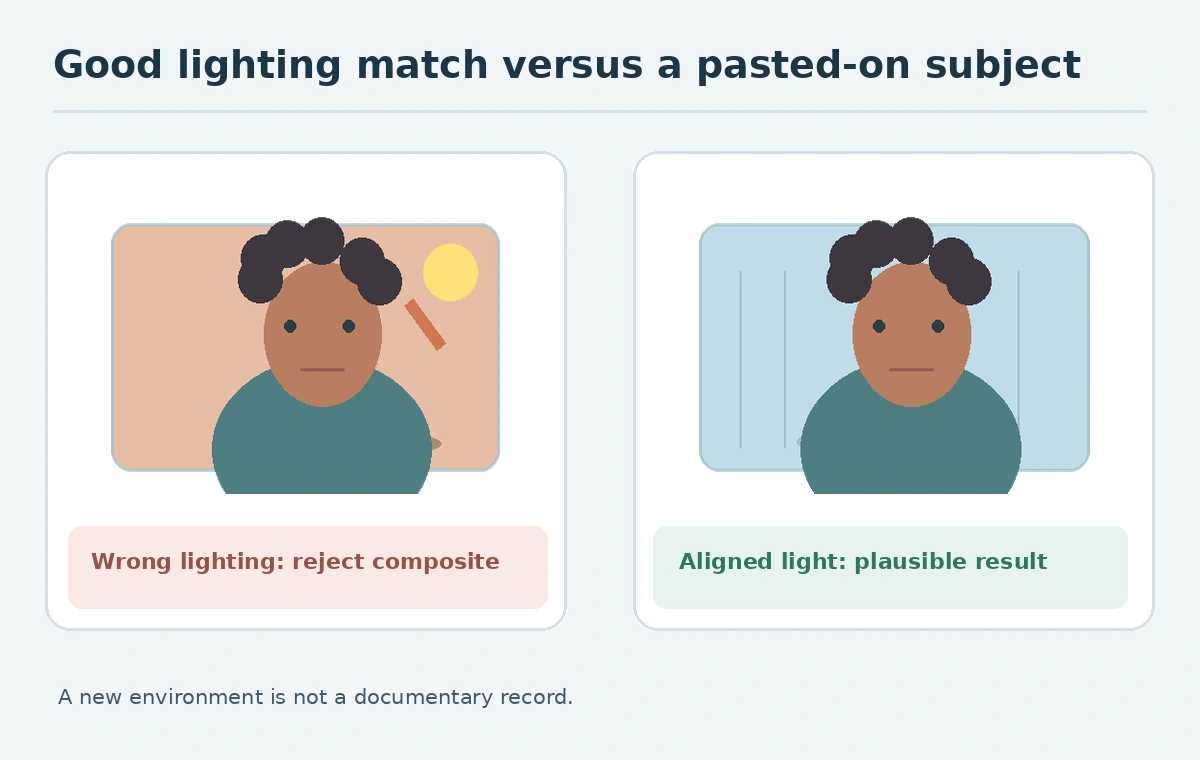
A backdrop with morning sunlight from the right will look wrong when the subject’s face is lit from the left. Look at the original nose shadow, cheek highlights and edge light; select a background whose illumination could plausibly cause those clues. If the person is standing, their feet need a grounded contact shadow; if the crop is waist-up, watch the shoulder outline and hair. Avoid adding a crisp shadow that conflicts with an otherwise diffuse image.
Canva’s photo background help describes additional relighting options such as balanced and stronger adjustments. Those choices are editing features, not physically measured light simulation. Compare rather than assuming they will always produce an accurate composite. A slightly simpler flat backdrop is often more believable than a dramatic photorealistic scene with clashing illumination.
Inspect the mask against multiple contrasting colors
Place the edited portrait against light and dark temporary backgrounds to find missing strands, leftover green-screen halos and sharp rectangular edges. Zoom to one-to-one around glasses, ears and hair. A small visual defect may be invisible on a white desktop but become obvious on a dark mobile design. Correct the selection or choose a different source rather than piling on regeneration attempts that reshape the face.
Use a before/after view anchored to the same face crop and scale. The shape of the nose, jaw, eyes and clothing should not move. If it does, the tool has performed a subject transformation, not just background replacement. With product photographs, keep real labels and dimensions visible; do not allow a generated background to create an invented product feature or hide a safety warning.
Use the right output and explain the composite
Export to the real destination dimensions and inspect the final file after downloading. A transparent asset and a complete composite serve different purposes: transparent PNG can be reused against multiple page colors, while JPEG or WebP may be more appropriate for a finished scene. Keep the original subject image and your editable design so the background can be changed without regenerating the person.
For accessibility, describe what is pictured and, when relevant, identify that the environment is a composite or illustration. A user seeing a team profile should not falsely conclude that the portrait was taken inside the represented office. Follow W3C image guidance for meaningful text alternatives. Add any advertising disclosure required by the specific placement or publication policy.
Apply a four-gate acceptance checklist
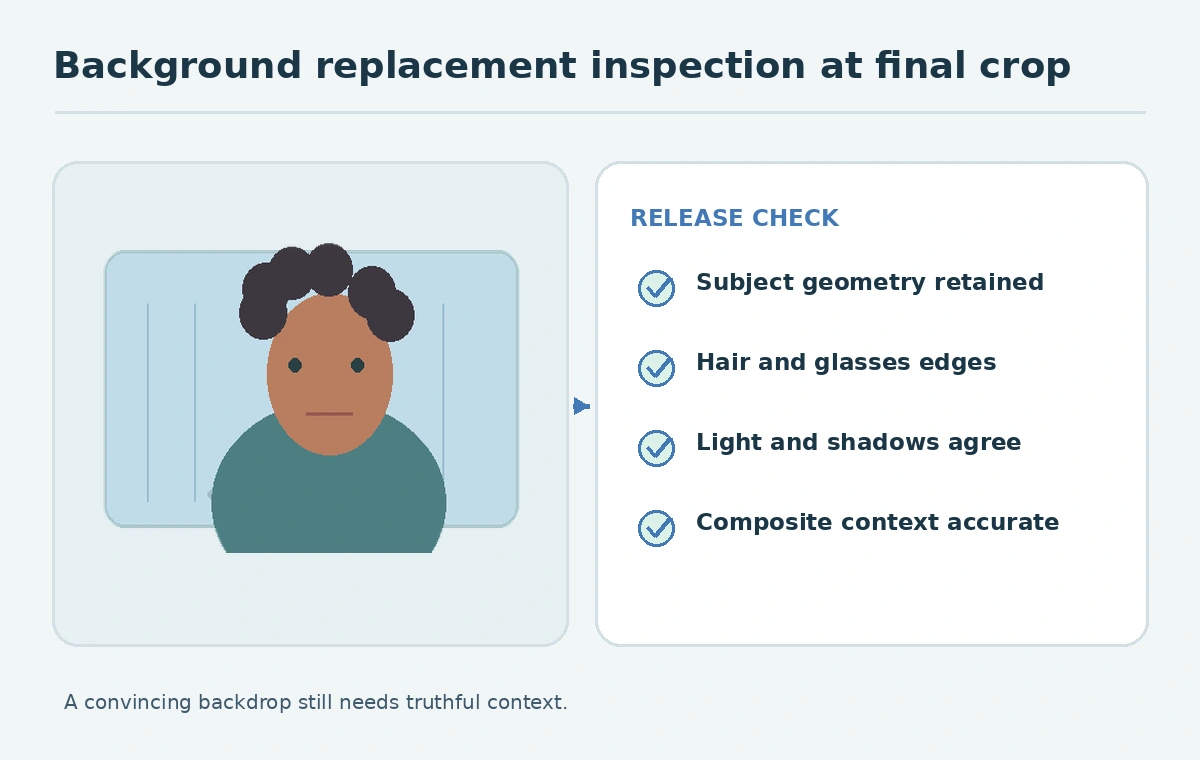
Gate one: permission to use and edit the source. Gate two: identity preservation, including hair, clothing and face. Gate three: compositing quality, including shadows, color temperature and cutout edges. Gate four: destination context, including truthful captions and a final-size export. A missed gate sends the graphic back for revision. This structure is easy to apply to a single website portrait or an entire staff gallery.
The Canva photo editor guide lists several adjacent editing tools, but you should not automatically apply all of them. Each extra effect adds another chance to introduce inconsistent lighting or unwanted detail. Store a short change record—“replaced plain studio backdrop with conceptual blue office gradient; subject unchanged”—and keep the source so the audience and editors can distinguish construction from documentation.
How We Research
We checked Canva’s BG Generator instructions, background-removal documentation, photo editor overview and W3C image guidance on October 27, 2026. All people and rooms in our illustrations are conceptual and not screenshots or results of a controlled Canva output test.
Frequently Asked Questions
No. Inspect the mask at full size and review it over contrasting temporary backgrounds.
Keep the subject protected, compare to the original and reject variants that redraw identity.
Light direction, color temperature, scale and contact shadows can conflict between subject and scene.
No. It can alter factual context; use the authentic photo and follow editorial disclosure policy.
Use transparent PNG for a reusable cutout and a suitable flattened format for an approved final composition.