
A boutique stationery maker has a 900 × 600 pixel watercolor postcard: a mountain, a red-roof cabin and a fine trail. The goal is a larger print, not a different landscape. Magnific distinguishes Creative upscaling, which may reimagine textures, from Precision, which aims for a more faithful enlargement. The crucial decision is how much visual change the artwork can tolerate. This guide uses a documented mode comparison and a practical print proof, rather than treating any sharper-looking output as accurate.
Write an acceptable-change brief before choosing the mode
Identify the protected elements in the source: one cabin, one trail, distant mountains and a blank sky where the title will be placed. Label the wash-like texture as aesthetic rather than factual. For a stylized postcard, adding subtle brush grain may be acceptable; adding extra cabin windows or a second mountain peak may not be. For a merchandise photograph, the tolerance would be lower still. Keep the untouched image and a 100-percent crop before editing. Magnific’s official upscaler documentation describes Creative and Precision as distinct approaches; it does not certify every generated texture as a recovered source fact. Our mountains and cabin are original teaching illustrations, not Magnific processing examples.
Understand Creative and Precision before adjusting anything
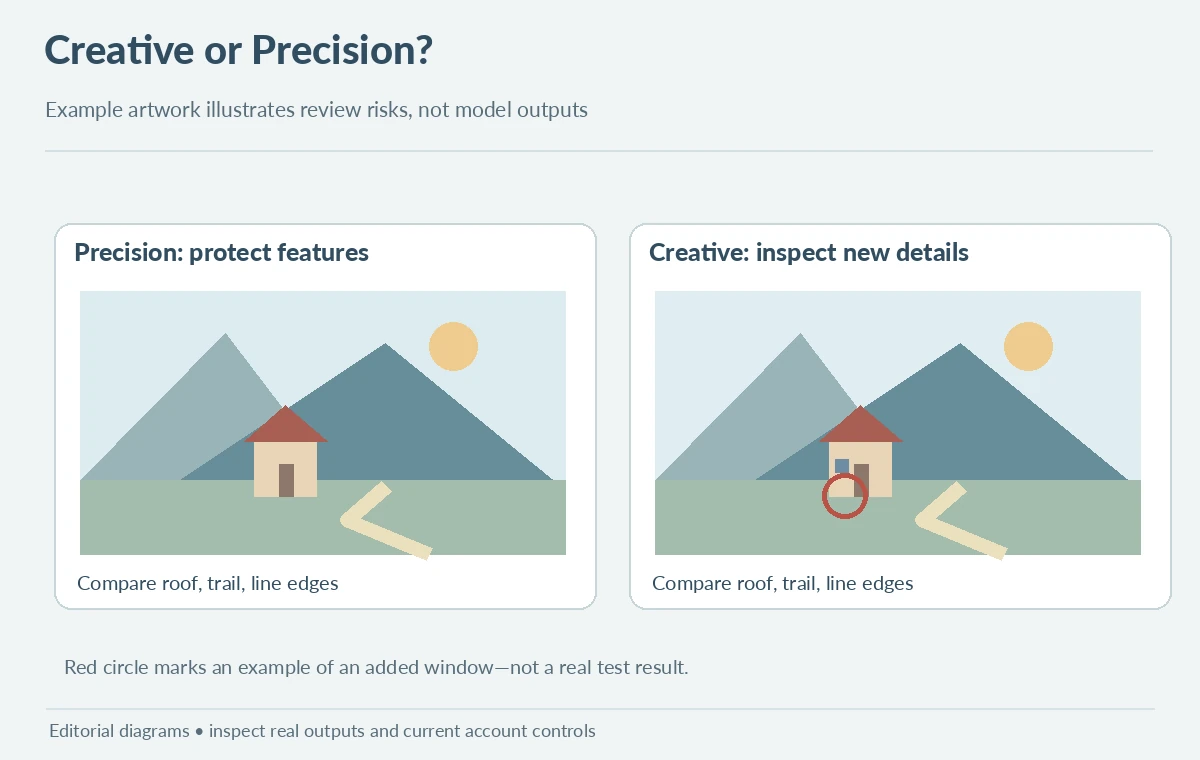
Magnific says Creative mode can reimagine details and supports prompt guidance with its Magnific model, while Precision is intended for faithful enlargement. The Creative section describes Creativity, HDR and Resemblance controls, each ranging from -10 to +10, and Classic presets named Subtle, Vivid and Wild. Do not misapply those sliders to Precision engines; the available settings depend on the selected model. In Precision, choose a flavor suited to the source rather than asking a prompt to repaint the scene. The diagram contrasts a watercolor brush-stroke texture with a controlled clean edge, and does not show measured output fidelity.
Calculate what the original pixels can actually print
The 900 × 600 source prints at 3 × 2 inches at 300 pixels per inch, or 6 × 4 inches at 150 ppi, before enhancement. A 2× scale produces 1,800 × 1,200 pixels; that is 6 × 4 inches at 300 ppi. These numbers are pixel arithmetic, not a promise of new optical detail. Check with the chosen print provider for its required resolution, bleed and color handling. Do not confuse PPI with a guarantee of quality, and do not claim that the source artwork contained the textures an AI process later invents. The print-size diagram includes the actual dimensions, so a reader can reproduce the calculations independently.
Compare controlled crops and watch for invented features
Make matching crops around the cabin roof, trail switchback and dark tree line. Inspect whether a roof seam changes, a trail becomes a stone wall, or watercolor grain turns into photorealistic foliage. At thumbnail size, the Creative candidate may look punchy and attractive even when local detail no longer reflects the original. Precision may look restrained but still introduce halos or sharpening noise. Use clear comments such as “added window,” “edge halo” or “loss of wash texture” instead of a fictitious 92% fidelity rating. Magnific itself differentiates artistic interpretation and faithful reproduction; the business decision is which deviations can be approved.

Select a safe setting for print or a deliberate creative variant
If the approved art must stay recognizable, start with Precision and review a physical proof. If the maker explicitly wants reinterpretation, treat Creative as a new derivative illustration and request artistic approval. In Creative, change one setting at a time so it is possible to explain why textures changed. The Runway guide to Magnific Precision v2 describes separate flavors and controls such as sharpness, grain and ultra detail in that deployment, showing why the selected interface matters. Do not assume that standalone Magnific and a third-party integration expose identical menus. Record the actual provider, engine and scale with the final file.
Perform a print proof with margins and legible type
Place the accepted illustration into a postcard design without baking a tiny title into the generated image. Use separately editable typography, printer-provided bleed, and a soft proof if the printer supplies a color profile. Export the required format and examine a test print under neutral light for banding, excessive texture, ringing around cabin lines and muddied shadows. Compare it beside the original image, not only beside the alternate AI-upscaled candidate. If the printed proof looks artificial, lower the enhancement or seek a new source image with sufficient resolution. The process ends with an actual proofing decision, not a download button.

Keep an evidence trail and disclose meaningful alterations
Archive source pixels, enhancement settings, selected model, approved output and annotated detail crops. A short source-to-output sheet helps a customer understand why the larger print looks different. Do not present AI-invented foliage or roof details as information recovered from an old photograph. Product sellers should also verify commercial use terms for the specific provider and account. The illustrations here show possible failure modes as explanatory drawings; we did not run the paid model or compare measured artifacts. The useful outcome is a print-size calculation, mode-selection rule and inspectable approval record for an artwork that must survive enlargement.
How We Research
We reviewed Magnific’s product documentation and Runway’s Magnific Precision v2 instructions on October 28, 2026. These document the difference between Creative and Precision and show that controls depend on the provider. Print-size math is independently calculated from stated source dimensions; we did not perform a paid upscale or physical print test. All cabin variants are conceptual illustrations.
Frequently Asked Questions
Start with Precision and inspect it closely; no AI upscale guarantees perfect fidelity.
Yes. Magnific describes creative reimagining and detail enhancement.
Six by four inches before any printer-specific bleed or trim.
No. Settings differ by engine and deployment; use the current interface documentation.
Compare matching 100-percent crops and examine an actual print proof.