
A portrait of a cyclist standing beside a bicycle offers an unusually demanding test of selective background blur. The person’s face may be easy to identify, but the wheel contains many thin spokes and empty gaps that reveal the distant park behind it. A broad blur can accidentally paint over the spokes or leave a sharp halo around the rim. Lightroom’s Lens Blur controls can make the background feel softer, yet the photographer must still define what belongs in focus. This hypothetical park portrait illustrates a repeatable review method, not an edited photo or measured software result.
Decide which parts of the portrait tell the story
Start by writing down what needs to remain sharp: the cyclist’s eyes, helmet, brake levers, tires, and the near edge of the frame. The trees behind the bicycle are supporting scenery, so they can receive the strongest blur. This decision comes before moving any slider. If the rider is holding the bicycle at an angle, the nearer handlebar may be on a different depth plane from the rear wheel. A single automated focus zone may not describe that geometry perfectly. Keep the original file available so a rejected version can be compared without confusing editing changes with camera focus.
Apply Lens Blur at a restrained strength
Open the image in Lightroom Classic’s Develop module, enable Lens Blur, and begin with a relatively modest Blur Amount. Adobe’s documentation describes adjustable bokeh styles as well as the depth controls. Choose a style only after checking the original points of light; a busy pattern of artificial highlights can distract from the rider. The purpose is to guide attention, not to imitate an expensive lens at all costs. View the photograph at the size a reader will actually encounter it and avoid judging success only from a tiny thumbnail. Strong blur can disguise the very edge defects you need to inspect.
Compare Subject Focus with manual Point or Area Focus
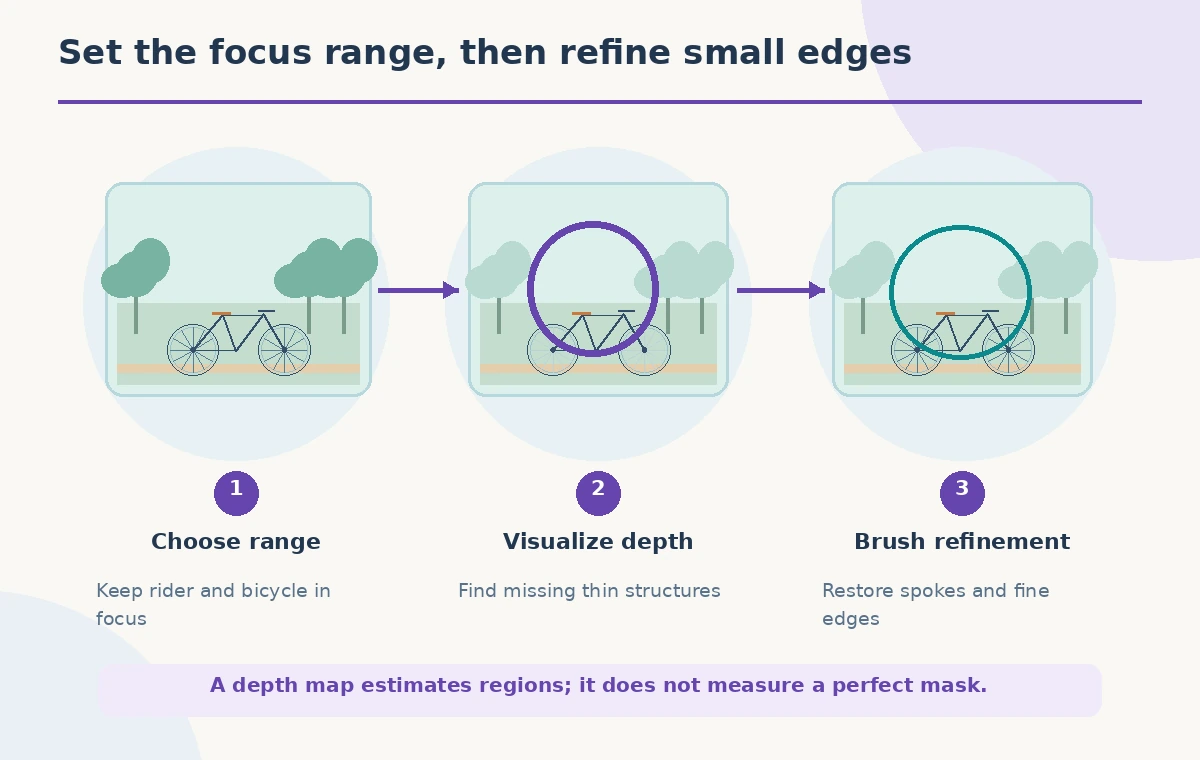
Subject Focus can establish an initial range through AI subject detection, but it is a starting point rather than a guarantee that every bicycle component is in focus. Try the Point or Area Focus control if the rider and bicycle occupy slightly different distances. Drag the focus range to keep the parts needed for the portrait, and note where the rim begins to lose definition. A bicycle is not one solid object: the gaps between spokes display the background, while the slender metal spokes themselves should remain coherent. Switch between settings before deciding which is more faithful to the photograph.
Read the depth map before refining the spokes
Turn on Visualize Depth to inspect the estimated near and far regions. Adobe describes these colors as a visualization of focus information, not a physical depth measurement. Scan around the front tire, the triangle of the frame, the helmet strap, and the small openings by the brake cables. Look for sudden color changes that cut through an object, since those may predict an unwanted blur boundary. The diagram in this article highlights those regions for an imaginary scene. Real depth estimates depend on the photograph and should not be inferred from the drawing’s colors or positions.

Use Focus and Blur refinement brushes deliberately
Open the refinement tools and select Focus to protect a thin part that should stay crisp, or Blur to soften a patch of background that remains too sharp. Work in short strokes with appropriate brush size and feathering. Painting a large solid focus shape over a wheel can turn the open spaces between the spokes into an oddly sharp disk, which looks just as wrong as missing spokes. Zoom in and trace the actual metal lines rather than painting the entire circle. If you cannot preserve intricate geometry at the chosen strength, reduce the overall blur rather than compensating with dozens of unstable local corrections.
Compare three distinct versions without moving the crop
Keep a reference copy, an exaggerated blur for diagnosis, and a restrained refined version. Display all three at the same scale and crop. In the exaggerated example, the distant park loses detail but the spokes also dissolve; that is a warning sign, not a target look. In the refined example, the trees remain softer while the wheel retains its fine structure. These are conceptual states, not exports from Lightroom. Comparing matched crops prevents a composition change from masquerading as a better AI result and makes it easier to explain a revision to another editor.
Inspect edge halos and foreground mistakes
A pale rim against dark foliage is likely to expose a halo. Check whether the blurred background seems to leak across the tire or form a bright ring around the helmet. Also examine the shadow beneath the bicycle, where ground contact and distant scenery can share a similar color. Thin straps, hair strands, and brake cables deserve closer inspection because one missing strand can change the perceived shape. Toggle Lens Blur off and on rather than relying on memory. If the artifacts remain visible at normal viewing size, adjust focus range, refine locally, or accept a gentler blur.

Export with the original depth story intact
Save an editable version, then review the exported image in the intended layout. Small compression artifacts can appear around high-contrast spokes, so inspect the actual delivery format. If the portrait is used in journalism or as evidence of a place, consider whether altering background visibility could change its meaning, and disclose material edits where appropriate. Do not invent a camera model, aperture, or measured processing time from the effect. The defensible outcome is a believable editorial portrait whose important geometry has been checked manually, not a claim that software made every edge flawless.
How We Research
We consulted Adobe’s Lightroom Classic Lens Blur guide for Focus Range, Subject Focus, Point/Area Focus, Visualize Depth and brush refinement, and its Lightroom blur guidance for depth visualization and bokeh controls. We did not process a real cyclist photograph, measure sharpness, or claim that a particular image was generated in Lightroom. The drawn comparisons demonstrate where a human editor should inspect a hypothetical scene.
Frequently Asked Questions
No. Fine metal structures may cross the inferred depth boundary. Review the wheels and use refinement controls or less blur.
Not necessarily. Different distances and overlapping objects often need different amounts of softening.
It is a visual guide to Lightroom’s inferred focus and depth regions, not a calibrated distance map.
A stronger effect exposes imperfect depth masks, halos, and unnaturally sharp gaps around small objects.
No. They are original editorial drawings explaining an inspection process, not a performance test.