
A small museum is exploring how to display a ceramic urn on a raised plinth. The room sketch includes one doorway and an unobstructed visitor aisle. A moody rendering can communicate the design, but it cannot prove that the display satisfies accessibility rules or that the plinth can safely support the artifact. The risk is especially easy to miss when a believable image makes proportions feel measured.
Adobe describes Firefly Scene to Image (beta) as a workflow for building a simple 3D scene with shapes, setting composition and camera angle, and generating image variations that reference that layout. It is a visual concept tool, not architectural CAD or engineering analysis. This hypothetical example uses a generic urn, not a real collection item, and shows how to prevent concept imagery from masquerading as a construction specification.
Write the real-world constraints before making art
Ask the registrar, preparator, and accessibility lead for an approved room plan and artifact handling requirements. Record the verified doorway position, restricted routes, protection zone, case or plinth type, and any minimum clearances supplied by responsible specialists. If dimensions are missing, mark them unknown. Do not ask a generative image to solve structural capacity or legal accessibility requirements.
Keep two files: an authoritative measurement sheet and a concept brief. In the concept brief, specify that the ceramic urn is a placeholder with a simple rounded silhouette and that the proposed aisle is intentionally generous. Avoid drawing numerical dimensions into the generated picture; a polished number on a render is not evidence that somebody measured the site.

Build a blockout in Firefly Scene to Image
Adobe’s documented Scene to Image experience starts from the Generate section of Firefly. The user enters a scene-building workspace powered by shapes from Project Neo and can combine a 3D composition with a text prompt to create images based on the scene’s angle and depth. This is different from prompting a flat text-to-image generator with no underlying scene arrangement.
Build an approximate gallery wall, doorway, rectangular plinth, and simplified urn. Set the camera to show the aisle rather than hiding it behind the urn. The blockout helps colleagues discuss proportions, but the coordinates do not replace a measured drawing. Save the scene layout and record when the concept was made, because later revisions may appear similar while moving key objects.
Prompt the look while keeping placement reviewable
Use a narrow prompt: neutral museum gallery, warm diffuse lighting, ceramic urn on a single raised plinth, unobstructed route from door to display, no signage text, no people blocking the walkway. The text can influence style and materials; it does not turn the render into an approved installation. Review multiple image variations and reject those that add walls, pedestals, rails, or doors that were not in the brief.
Ask for a plain floor treatment with enough contrast to see the base of the plinth. Very dramatic shadows can conceal circulation obstacles or make a shallow platform look deeper than it is. A separate annotation layer in the presentation can identify “concept only” rather than embedding fake measurement marks into the artwork itself.
Compare cramped and clear visual layouts
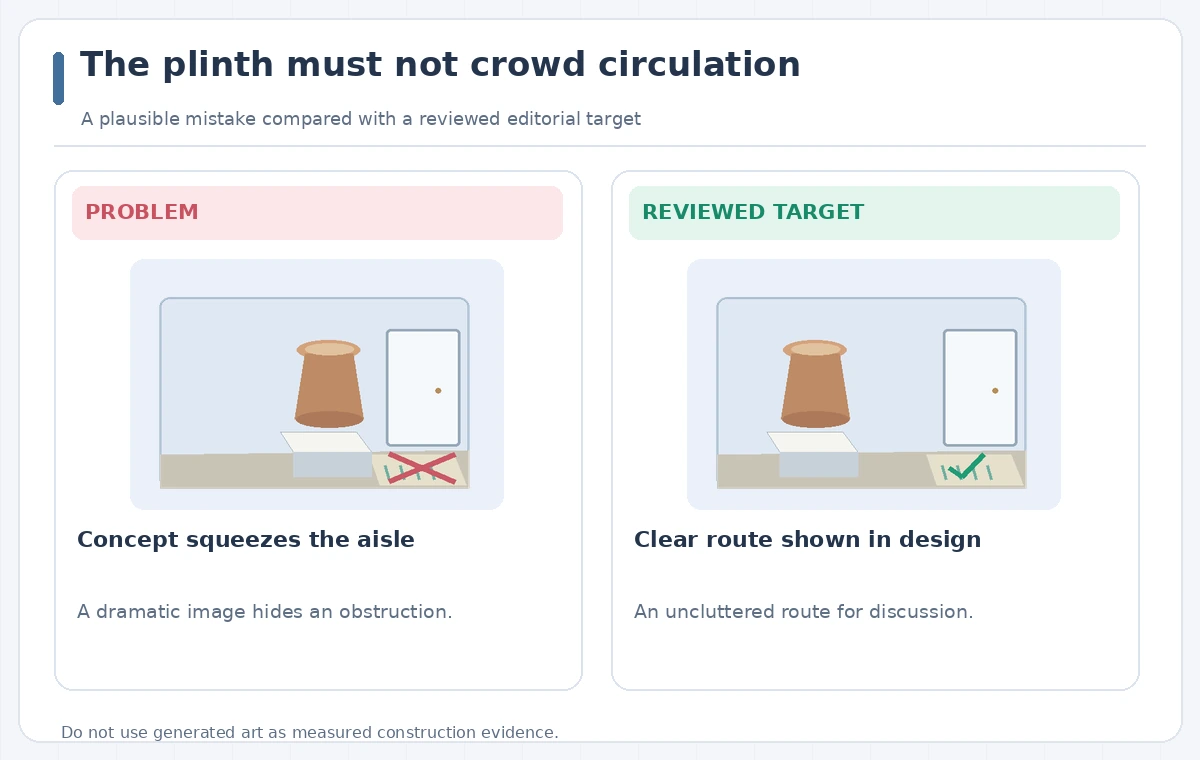
The teaching comparison shows a plinth close to the aisle in one frame and more space in the other. Neither panel makes a regulatory compliance claim; both are illustrative drawings. A layout can look comfortable at a wide lens angle while the actual aisle is narrow. Always compare the concept with the verified floor plan and measurements rather than declaring one image “code compliant.”
Inspect entry and exit lines, the route around the plinth, the visibility of the artifact, and the potential for a barrier or cable to become an obstruction. A gallery technician should verify the real handling envelope and material requirements. If the generated scene invents an additional door, a dimension label, or a wall opening, remove it from the proposal.
Review object integrity and provenance
If the museum uses a photograph of an actual collection object as input or reference, confirm that the image can be used in generative workflows and that the render does not turn it into an inaccurate reconstruction. The urn in this example is fictional, so its decoration should not be passed off as a record of a real artifact. Ensure labels distinguish concept art from collection photography.
Keep provenance information and object handling instructions in ordinary project documents, not as details inferred from generative appearance. A rendered ceramic surface does not tell a registrar its weight, fragility, or required mount. Ask the appropriate specialists to inspect those facts separately, especially before the concept reaches a fundraising or contractor presentation.
Treat the rendering as a conversation starter
Export a small set of approved concept views rather than a large collection of conflicting images. In the accompanying slide, state which decisions the image is meant to illustrate: plinth location, sightline, or lighting mood. List what the image does not approve: aisle width, engineering loads, fire egress, conservation environment, and fabrication drawings. Assign an owner and due date to each unresolved requirement.
Have the accessibility lead compare the concept with the latest measured plan, and have the exhibition designer check that visitor movement remains easy to understand. If a stakeholder requests a narrower aisle to fit another case, update the verified plan first; do not accept an aesthetically pleasing render as an implicit change authorization.
Release a concept, not a construction instruction
The final gate should confirm that the project has an original blockout, retained 3D scene settings, a verified measurements document, clear imagery labels, and named specialists who must approve later design stages. If any generated variation suggests unverified clearance or impossible supports, reject it. The render should make the proposal clearer without making claims beyond the brief.
When the team moves toward fabrication, use accurate measured drawings, site surveys, load and safety reviews, and the institution’s established approvals. AI-generated imagery may remain in the presentation as an illustrative mood board. Its proper role is to help people discuss a visual arrangement, not to replace the responsible technical and accessibility decisions.

How We Research
We reviewed official developer documentation on November 4, 2026: Adobe Help — Create 3D scene for image generation reference; Adobe Help — Creative Cloud generative AI feature list. We checked documented features, required permissions, access limitations, and the distinction between tool output and factual approval. The project example of museum plinth with ceramic urn beside an illustrative visitor aisle is hypothetical; we did not sign in to a paid account, create an actual output, benchmark image fidelity, verify live venue or product records, or audit licensing fees. The graphics show constructed potential errors and desired review states, not captured application results. Reconfirm features, rights, and external facts in your own workflow before publication.
Frequently Asked Questions
No. Adobe documents a shape-based 3D composition used to guide image generation, not an engineering or code-compliance system.
No. Confirm required clearances against measured site drawings and the applicable professionals or authorities.
Adobe documents scene composition, camera angle, and depth references using 3D shapes combined with prompts.
Use only images with appropriate rights and review every generated representation for misleading changes to the artifact.
No. They are conceptual diagrams showing an editorial review method rather than measured software results.