
A fictional community garden wants a simple leaf-and-spade icon for volunteer tool boxes. Someone drew the symbol with a felt-tip pen and photographed the paper. Kittl’s Image Vectorizer can convert a raster into editable vector shapes; however, an attractive preview is not the same as a manufacturable cut file. The difficult parts are small detached marks, narrow gaps, overlapping shapes and the way a vinyl cutter follows outlines. This tutorial uses a hypothetical sketch, an illustrative noisy trace and an editorial cleanup plan. No commercial cutter, Kittl session or finished sticker was actually tested.
Choose a simple sketch that can survive reduction
Use a bold leaf and one spade silhouette rather than a photograph with hundreds of tonal shifts. Put the icon on a clean light background, crop away the notebook, and reduce shadows, glare and JPEG blocking before vectorizing. View the artwork at the smallest intended sticker size; if the vein pattern already disappears on paper, automatic tracing will not recover a credible cut path. Establish which parts should be solid material and which should be empty space. Keep the unedited raster as the provenance record, since a converted vector can smooth away distinctive details or invent edge contours from compression noise.
Open the vectorizer in the documented interface
Kittl’s help guide says to select a raster image on the artboard and choose Vectorize through the contextual toolbar’s menu or the Tools panel. The Vectorizer appears for eligible raster objects, not an already editable vector. The current help says this vectorizer is available on the free plan and does not spend AI tokens, but other export capabilities and account features have their own rules. If the command is absent, inspect what kind of object is selected before assuming the account requires an upgrade. Do not treat product marketing screenshots as reliable instructions when the actual editor differs.
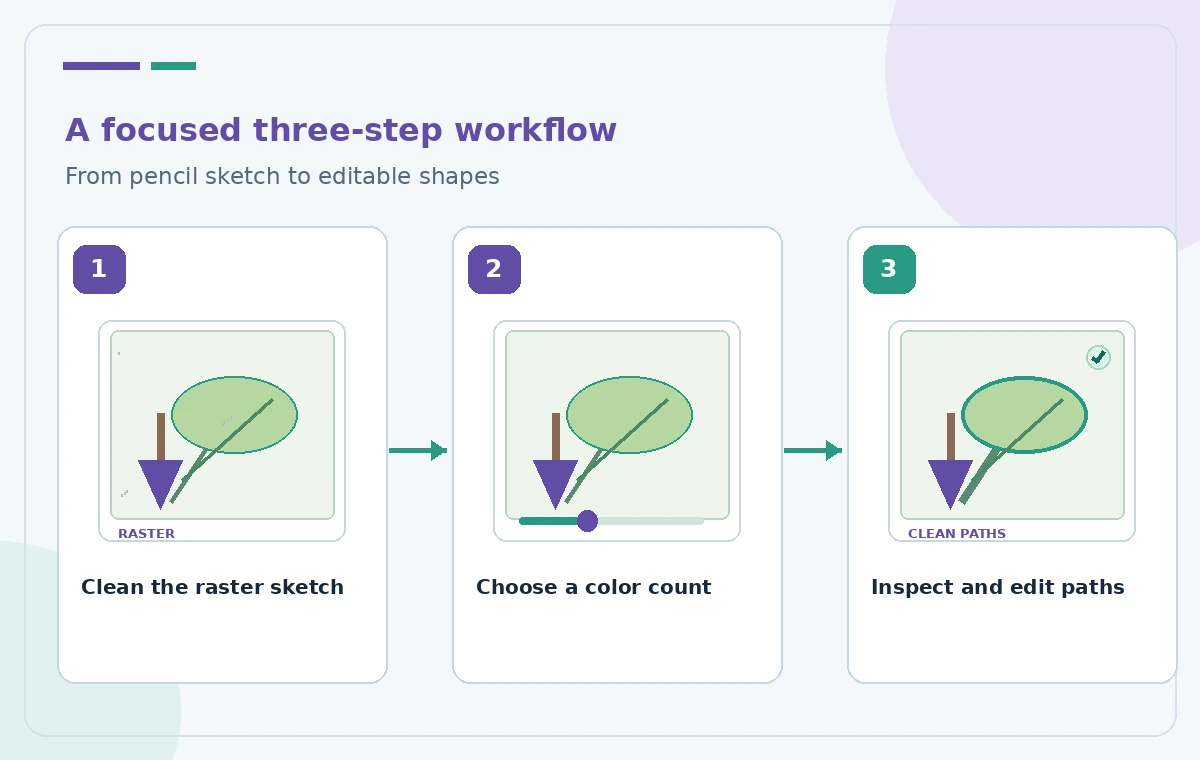
Adjust the Colors setting for a cut-friendly result
The documented Colors slider controls how much color variation is retained. Fewer colors typically produce simpler graphic regions; more colors may retain subtle detail at the cost of extra shapes. A one-color vinyl mark generally needs fewer meaningful regions than a decorative full-color printed sticker. Start with a low color count, use Vectorize Image, then examine the output as editable artwork. Compare several versions only if each addresses a specific loss such as a missing spade handle or an accidentally joined leaf stem. The tool can create vector artwork, but it cannot infer the actual minimum feature size of a chosen vinyl stock or cutter.
Look for stray islands and broken outlines
Zoom in to inspect each leaf tip, handle join and enclosed hole. A texture fleck from the source photo may become a tiny independent vector island that a cutter attempts to peel. Extremely thin bridges can tear during weeding. Distinguish deliberate holes from accidental ones by using the original sketch and a simple black-and-white printout. In the comparison diagram, the noisy middle state includes extra dots and a broken contour for teaching purposes. That state is a generic trace failure, not an output measured from Kittl. Flag questionable features for manual correction rather than assuming a smooth thumbnail means clean geometry.
Edit the resulting vector by hand
The official vector-editing guide describes double-clicking into vector shapes, then adjusting nodes and handles, adding or removing points and refining corners. Use those controls to close a gap, delete a stray island and simplify a jagged edge. Preserve the concept of the submitted artwork while reducing points that do not contribute to the silhouette. Avoid making curves so abstract that the spade becomes indistinguishable from the leaf at small size. Reopen the sketch next to the vector and compare prominent proportions. Record manual changes, especially when another designer has authorship or approval rights over the original symbol.

Test scale and negative space
Prepare an actual-size paper proof at the smallest planned sticker width. Inspect whether leaf veins, narrow cutouts and the separation between spade and stem remain legible. Readability at 300% zoom is a weak predictor of readability at an inch wide. Ask the vinyl supplier for their current minimum stroke and gap requirements; do not invent universal tolerances. A complex design might be better printed than cut from separate pieces. Consider a fallback simplified silhouette without interior lines for tiny labels. The process diagram marks the clean silhouette as an editorial target, not a certified manufacturing result.
Export the right deliverable for the supplier
Kittl’s export guidance explains formats and color options. An SVG can preserve scalable paths, while a PDF can help when a print workflow requires specific page and color setup. The help also notes that SVG files use RGB and that CMYK output is available for particular export formats rather than every file type. Do not promise that a chosen SVG will automatically be accepted by a vinyl cutter. Ask the printer which vector format, outline configuration and artboard dimensions they require, and confirm whether shapes must be united, expanded or separated before cutting.
Review ownership, color and communication
Verify permission to reproduce the original hand-drawn symbol and any imported fonts or decorative assets. Check that the final vector has the agreed community garden palette and is not confusingly similar to another local organization’s logo. For printed versions, colors can shift between screen and material, so an on-screen swatch alone is not a proof. Do not depict brand approval or final cut quality as an AI-generated badge; keep approval records outside the artwork. If the volunteer who drew the original wants attribution, document it in the project notes. Keep an editable file alongside each exported delivery variant.
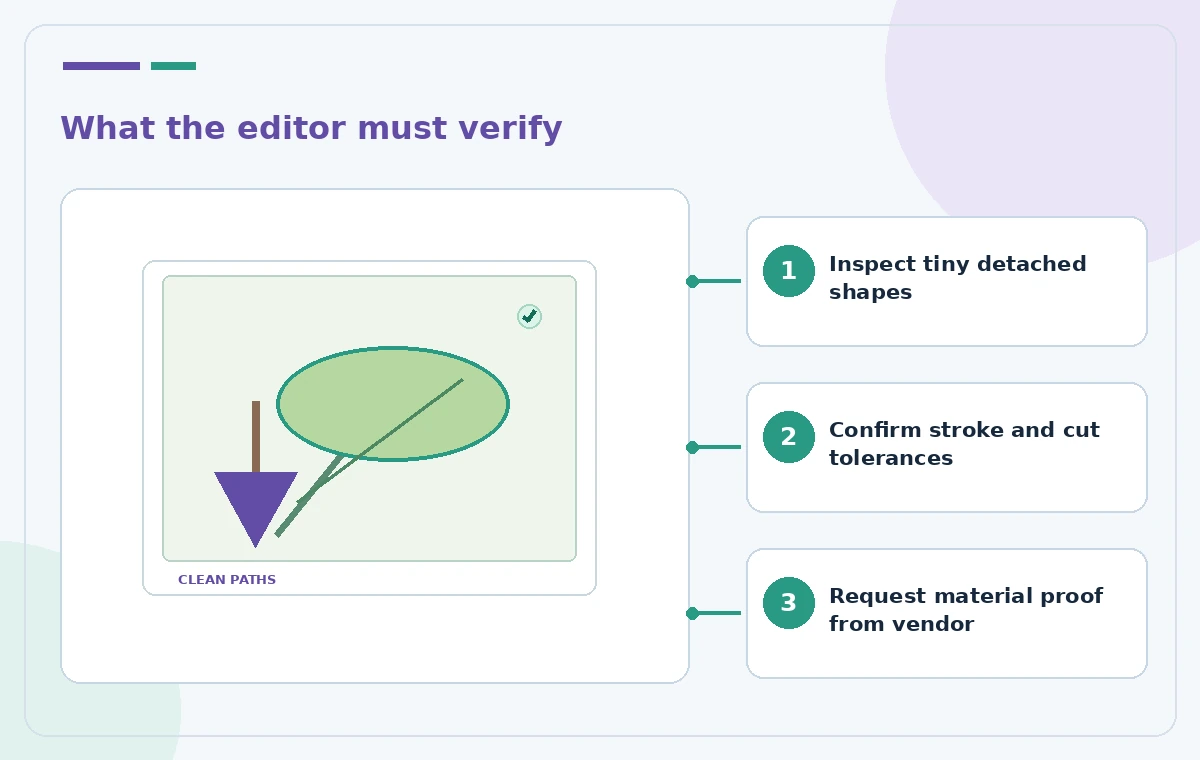
Sign off only after a physical proof
Before ordering dozens of labels, inspect the final paths at 100%, confirm the correct file was exported, and request a small physical sample on the actual stock. Check cutting, weeding, transfer and legibility after application to the intended surface. Ask a human designer and the print vendor to approve the result, then archive the selected file version. If a sample fails, simplify the geometry and reproof rather than blaming a vague ‘AI error.’ The garden icon is an educational example, not evidence of an actual Kittl render, supplier quote or production-tested sticker.
How We Research
We reviewed these named official developer resources: Kittl Help — Use Image Vectorizer; Kittl Help — Edit vector paths; Kittl Help — Export your design. We checked the documented feature entry points, eligible platforms, administrator or licensing controls, and known sharing or source limitations against the tutorial steps. Editorial examples were designed as hypothetical failure-mode checks, not reports of hands-on testing. We did not have a live account, source files from a museum or nonprofit, user interviews, access to private records, or measured model outputs. Every illustration is original explanatory artwork rather than a vendor screenshot or measured before/after result. Features and entitlements can change. A responsible editor should confirm current product documentation, applicable organizational policy, and the original evidence before putting the workflow into consequential use.
Frequently Asked Questions
Kittl currently says this vectorizer uses no tokens and is available on every plan, including Free.
Not reliably. Kittl recommends flat, simple graphics; photographic gradients and texture can lose fidelity.
Yes. Kittl documents editing vector nodes, handles and illustration colors.
No. Check the printer’s format and geometry requirements and request an actual material proof.
Fewer color regions can simplify an icon and eliminate spurious details, but review that meaningful features remain.