
A museum educator films a walkthrough in a public lobby. The main presenter has agreed to appear, but a passerby crosses the rear of the frame and has not granted permission. Blurring that moving person is a plausible use for Premiere Object Mask: isolate the subject, track the selection, and attach a localized blur. It is not proof that privacy has been protected until every frame is checked. This guide uses a fictional lobby scene to document how to pick the right object, refine difficult edges, and inspect whether the blur ever drops away. Illustrations show an editorial masking workflow, not real Premiere screenshots.
Separate the authorized presenter from the passerby
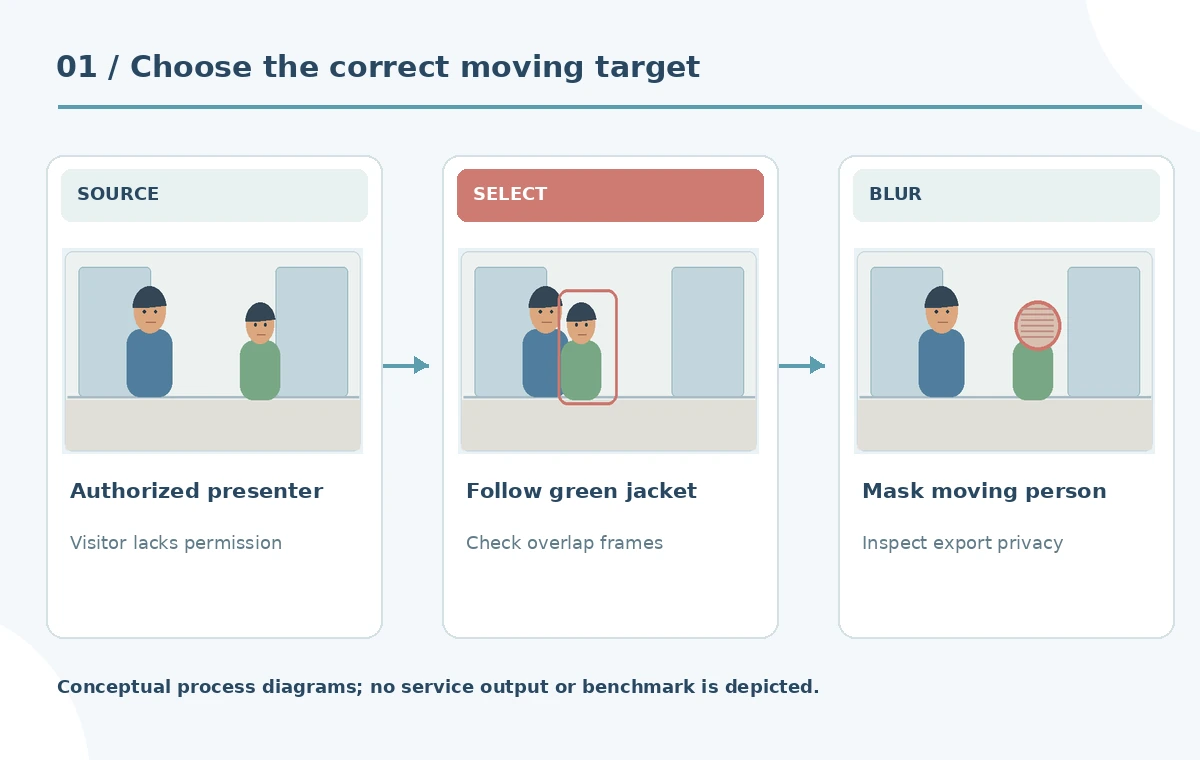
Before launching any effect, determine whose identity must be concealed and why. Write the consent status of the presenter, visitors, staff and any incidental children. In the illustrative scene, a green-jacketed person crosses behind a blue-jacketed presenter. The green-jacketed passerby needs a consistent privacy treatment; the presenter should remain sharp. Label them by position and clothing rather than inferring names or identities. A cut where the two people overlap creates a special risk, because an AI selector can transfer the mask to the wrong person. The simplest safer editorial alternative may be trimming the segment entirely if reliable masking is not possible.
Select the subject using Premiere Object Mask
Adobe’s Object Masking guide says the tool automatically identifies selectable people and objects in the Program Monitor. Hover and click the appropriate highlighted subject, or use the Rectangle or Lasso approach when the desired subject is not selected automatically. The first time the tool is used, Premiere downloads supporting models, so the function may temporarily be unavailable until the download completes. Do not assume everything in the image is selectable on a given computer: Adobe documents differing coverage on some older graphics configurations. Once a subject has been selected, review the outline before starting the track. The selection is a proposed object boundary, not a privacy guarantee.
Pick an edge mode that suits hair and clothing
Adobe describes Sharp and Smooth edge modes for Object Masking, with sharp edges often working for hard, high-contrast objects and smoother edges useful around hair and more delicate boundaries. For the passerby, a jacket seam can remain defined while fine hair may need softer treatment. Preview the effect against contrasting lobby walls, glass doors and darker shadows. An edge that appears acceptable against a bright wall might leave a recognizable ear against a dark doorway. Check what the installed version supports before assuming an expansion adjustment exists with every edge mode. For privacy, favor reliable coverage slightly beyond exposed identifying features over a razor-thin mask that slips.
Track motion through the actual shot, not a still frame
Advance the subject through their approach, crossing, turn and exit. Tracking should keep the blur attached to the same person as they move past foreground elements. Pause at the moment the passerby crosses the presenter or goes behind a sign. The subject boundary may be hidden temporarily; ensure it reappears correctly and does not latch onto the presenter or a similarly colored jacket. Use correction controls in the actual application where necessary and rerun or refine affected spans. The timing strip in the diagram represents hypothetical review positions, not measured accuracy. Never approve on the basis of the first or most attractive keyframe.
Apply a blur that actually conceals identifying details
Isolation and protection are distinct steps. After tracking the intended person, apply a blur or other appropriate local treatment to the masked area. A subtle cosmetic blur may still reveal eyes, tattoos or a name badge, especially at 4K resolution. Check the output at intended delivery size and in still-frame enlargement. For a confidentiality-sensitive clip, consider obscuring the whole head plus distinctive identifying marks, not only a small face region. If an unmasked reflection in a glass door reveals the same individual, cover that separately or choose a different shot. Keep a clean source copy in a restricted location, distinct from the public export.

Review a timeline map of high-risk frames
Build a short frame checklist: initial appearance, first occlusion, closest approach, overlap with presenter, turn into shadow, and final exit. Mark each frame as not yet reviewed until someone has inspected the export. Zoom in at normal speed and frame by frame, checking both the subject and background. Watch for mask clipping through fingers or revealing an eye at the edge. A tracked mask may also cover important text or a presenter’s face; that is an editorial failure even if the passerby stays hidden. At every cut, decide whether a new selection and track are necessary. One selection across a multiclip montage is not an adequate test.
Keep the masking method reversible and accountable
Use a duplicate sequence or adjustment track, and retain the original source under suitable access controls. Record the shot name, person to obscure, selected mask mode, correction intervals, exported version and reviewer. Avoid embedding private personal data in asset filenames or public notes. If the workflow involves regulated or sensitive material, consult the relevant organization’s privacy standard rather than assuming a generic blur satisfies it. The diagrams use recognizable clothing colors only to illustrate target selection; they are not screenshots of real visitors. Object Mask reduces manual keyframing effort, but final responsibility for privacy and editorial accuracy stays with the human publisher.

Run an export-only privacy acceptance pass
Render the exact intended delivery format and inspect that file, not only the preview canvas. Compression can make a supposedly anonymous face unexpectedly interpretable or reveal mask boundaries during movement. Check the source-to-export mapping to make sure that no unprocessed shot was accidentally substituted at the final stage. Review on a phone and a larger display. Verify captions and any on-screen labels do not independently name the concealed person. If the privacy treatment fails on even a brief frame, fix the track or remove the shot before sharing. A green pass marker in an editorial diagram must never stand in for an actual exported-video inspection.
How We Research
We reviewed Adobe’s Object Masking documentation and the August 2026 Sharp/Smooth guidance on October 28, 2026. We did not operate Premiere or apply a mask to real footage. The lobby characters, coverage map and blur examples are fictional illustrations; successful tracking and privacy protection are not claimed.
Frequently Asked Questions
Adobe says Premiere downloads required models on first use, during which the masking feature is temporarily unavailable.
Adobe documents drawing a Rectangle or Lasso around a target as an alternative to selecting a highlighted object.
Adobe describes Smooth mode for softer, delicate boundaries, although each actual shot still needs review.
No. Blur strength, coverage at every frame, reflections and identifying clothing must be checked in the export.
Inspect the overlap frame by frame, correct the tracking, or exclude the shot if reliable separation cannot be achieved.